Pages

Ladies, if you haven't heard about environmental friendly reusable menstrual products, please read posts on Cloth pads & cups...
Showing posts with label Sewing Fun. Show all posts

Sunday, May 15, 2011

Sewing Notions 16 - Picot Foot

I bought a picot foot when I bought my Brother NV50 sewing machine.   Not sure why I bought it at such an early time of my sewing life..  :)


I have been wanting to learn how to use it and finally I managed  to use it 2 days ago to sew a Green bag inspired by Mila.  Will write about the green bag in another post.

What does a Picot Foot do?   It makes a narrow hem with the edge of fabric folded inside.    See the below:

Picture borrowed from Brother website

It is not so easy to use and I found a site which provide excellent information on how to use it:

1)  Learn about the Picot Foot -  http://www.threadsmagazine.com/item/3744/mastering-the-narrow-hemmer-part-one

2) How to sew using Picot Foot (Must read if you are new to Picot Foot and have one.. :) )  - http://www.threadsmagazine.com/item/3947/mastering-the-narrow-hemmer-part-two/page/all

--  Another way: http://www.berninausa.com/webautor-data/401/hemmer-feet-64-video.wmv
Sew a few stitches at the beginning without folding, and then use the thread to guide the fabric through the curl of the foot.

3) Additional techniques (corners, crossing over seam, etc) - http://www.threadsmagazine.com/item/3948/mastering-the-narrow-hemmer-part-three

Hope this help...

Bye,
Anic

Saturday, April 16, 2011

Sew Along - MyBotang Appliqué Project..3

Previous post about this: 
1) Sew Along - MyBotang Appliqué Project..1
2) Sew Along - MyBotang Appliqué Project..2


Once start... difficult to stop...  Here is my vase with flowers waiting to be machine stitched...   :)


Some part was not cut well... feel like I need to get better scissors...  Any recommendations? :)

Trying to do something else now...  :)

Bye now...
Anic

Sew Along - MyBotang Appliqué Project..2

Previous post about this: http://anic-lohas.blogspot.com/2011/04/sew-along-mybotang-applique-project.html

I found other interesting links...   The previous links I found were using Satin Stitch but I think the concepts apply to straight stitch for going round corners, circle etc..

Here is a nice video tutorial using straight stitch with raw edge:
   Applique-Raw_Edge_Stitching__D51.html

------Oh... it looks so useful to have a walking foot..   I want one..  :)

Another useful video with the details of cutting fusible web and ironing:
   http://www.youtube.com/watch?v=k1OahzmtM50

Other nice video tutorials of machine applique with hiding edges for future projects :) :

   Machine_Applique-Straight_Stitch__D57.html
   Invisible_Machine_Applique_Stitch__D53.html


Some real work:
I have the pattern cut out already..   Just on normal paper...   aiyah... actually,  I could have traced the pattern directly on fusible web which is what we supposed to do...


I have the habit of cutting out patterns and then use that to trace on fabric... (for hand sewn applique).


Cut not exactly the way the pattern was printed... added my own taste.. :)

Presser foot which I may use...  if not just the normal foot:


The tutorial said we could use either very light or very dark background...   I am going to try a dark one, hope it turns out well.   I want to make a blue bag.


A side note, anyone interested with the below little iron?  I saw it in one of the above videos, looks useful.  :)
Emma has it on her blog:


Emma doesn't have it in stock but if there are 5 units, she could help purchase.  It is RM78 each.  This is unconfirmed information, if there is interest, I could check.

Bye now and have a good weekend,
Anic


Wednesday, April 13, 2011

Sew Along - MyBotang Appliqué Project..1

So long...  I didn't sew...   There are other things which have higher priority..   When I am not doing something, I don't usually say I don't have time..  as I know it well that it is due to lack of priority given..  i.e.  if I could give something the priority, there will be time..  :)

Anyway,  I need a good push to sew something,  I decided to join Sue's sew along.


A perfect opportunity to:
1) Try out machine applique - em.. don't have applique foot-lah...
2)  Use the Steam-a-seam-2 I bought looong time ago from SS2 Craft World, quite pricey... I like Mila's way.. use interfacing and glue.. :)
3) Clear some fabric scraps..
4) Sew another bag,  planning to turn the applique into a bag....

My research before I start the project:
1) How to use steam-a-seam-2 
I watched the 3rd video on this page.

2) Machine Applique techniques 
---  Don't have Applique foot then use what erh?  
Read more about why applique foot is good:  http://www.sewaquilt.com/walking-foot-vs-applique-or-darning-foot.html,

I am going to just try open toe foot or the the normal foot..  let's see how it goes.. :)  I think the presser foot shown in the picture of Sew, Mama, Sew page is an open toe foot.

---  Some tips on how to stitch applique:
See point 11 of  http://www.myhappycrazylife.com/how-to-applique/

--- Tips of sewing corners, circles, squares:  
http://www.stitchemup.com/applique/satin-stitch.htm


Though the page use a satin stitch but I think the concept applies to straight stitch...


Good tips from the same link:
"Use your fingertips to guide the fabric. Regardless of how fast or slow you sew, too much pressure on the fabric prevents it from moving easily under the needle."


Preparation of material...  will report when my AA batteries are charged again...

Bye now..
Anic

Sunday, August 29, 2010

DIY Cloth Pad - Part 7 (Zorb)

 
 I sewn 2 cloth pads this morning.
One of them will be given to a colleague as farewell gift.   Not sure if she will take it alright but I thought this is the best gift I could give her.    I will attach a nice leaflet about reusable menstrual product plus instructions on how to use and wash.   Hope she won’t faint after opening the gift. 


How about you?  If you receive a cloth pad as a gift, how would you take it if you are not already a cloth pad user?

The top is suede cloth from US which a friend brought it back for me.    Inside, it is a layer of flannel & a layer of Zorb.  A layer of flannel is added between the top and Zorb so that I could sew channel in the middle without sewing through the Zorb.

Zorb is specially designed by Wazoodle for diapers making.  It is very absorbent and absorbs quickly.  It also dries quicker than other comparable material.  I washed the 2 pads this morning and they are almost dry now. (at 2pm).  It is very good if you want to make a heavy flow pad but do not want the thickness.  :)  Oh..  I must tell you how long it took for the items to arrive from Wazoodle, Canada.  More than 2 months by surface mail.  I thought they will never arrive...   If you would like to try out Zorb, I am happy to share some with you at cost plus postage from Canada & to you.

The bottom is a sandwiched PUL I bought from niceclothdiaper when they have 50% sale.  It is really a bit thick to be used as a hidden layer, so I just used it as bottom.

I read that suede cloth is good to wick away moisture.  When I did a test on the pad, it took 20ml water quickly and the top still feel dry when I touched it.  BTW, I read that a super-plus size Tampon takes up to 15 ml.  So 20 ml is really a lot...

Updated 4th Oct:  I think using both suede cloth & sandwiched PUL will make the user sweat, will have to try the suede cloth with micro-fleece or single PUL and see if it is less hot..  I like to have water proof for the pads I sew for new users as I don't want them to have leaking problems and have bad experience with cloth pads.  It is meant to encourage them to use cloth pad rather than driving them away..

What is Zorb?  Check out this link for more information.   Quoting a few key notes here:

Zorb contains only tangled cellulose fibers from bamboo/cotton/viscose and poly micro fiber, the same fibers found in virtually every AIO diaper on the market – nothing else. These non-allergenic fibers are non-allergenic, durable and easy to sanitize.  We manufacture Zorb in the USA and Canadian in modern facilities that are safe & friendly for workers and the environment.
 
For a head to head comparison on thickness, stacking Zorb on a desk against the common fabrics will show you something like this.  1 layer of Zorb is the same as:
•    3 layers of flannel
•    2.25 layers of French terry
•    1.3 layers of cotton fleece
•    1 layer of sherpa.
 
Now, to get the same absorbency, as 2 layer of Zorb, you will need:
•    8 layers of flannel
•    6 layers of French terry
•    5 layers of cotton fleece
•    4 layers of sherpa.

Feedback about Zorb by some cloth pads makers & users:
http://community.livejournal.com/cloth_pads/711850.html

I found a plastic version of traditional sew on snap, another possible fastening method:


If you are new to cloth pads, please read my other posting on Cloth Pads.

Saturday, August 28, 2010

Patchwork Wristlet

I saw Pink Penguin's cute patchwork wristlet and was inspired to make one.. 

So, I took out the scrap I have and started cutting and matching them.  Something quite pink..  :)


I have fun making this and maybe you would also like to try.   Pink Penguin's tutorial is quite detail, check out her site.  :)

Bye now and have a wonderful weekend.

Saturday, July 31, 2010

Bag Project 2 - T-Shirt Bag with Magnetic Snap

I sewed another T-Shirt bag.. 

For instruction, please see link posted in my previous post.  

It was sewn from the below T-Shirt from my sister in-law.   Too small for me and decided to turn it into a bag for her.

I have attached a magnetic snap for the bag following the instruction link posted in http://anic-lohas.blogspot.com/2010/07/wallet-project-part-2-looking-for-tips.html.   The lining is also from T-Shirts and I have strengthened the magnetic snap area with a strip from a thicker T-Shirt.


If you have old T-Shirts and can't find a new owner for them..   this is a good way to give them a new life.   :)

Thanks to all the wonderful people who have shared their experiences and the nice tutorials.

Wednesday, July 28, 2010

Wallet Project - Part 4 (Wallet completed)

Continue from Wallet Project - Part 3...

Finally I decided to use the same fabric as bias tape..  I couldn't find anything that looks matching from my stash of fabrics (not that I have many).


What I learnt from this project:

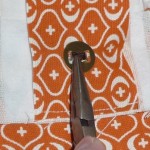
1)  Before pressing the snap button, should make a very small hole using eyelet punch.   I have also strengthened the snap area with an additional layer of fabric.

These 2 tutorials in combination give me a complete picture of attaching snap button:

(i) http://emma36handmade.blogspot.com/2010/04/blog-post_22.html - this show the step of puching a small hole clearly.  For Brother sewing machine owner, you should already have a eyelet punch in the set of tools came with the sewing machine.

(ii) http://www.zilakasim.com/tutorial/tutorial-snap-button/  (found alternatives for snap tool 1 & 2, check out you maybe overjoy with good price).

2)  Baste the bias tape before sewing, though it takes a bit more time, but the result will be a lot neater.  Actually anywhere which it is hard to sew, it will make it a lot easier, rather than trial and error using the machine.

3) Cut the interfacing piece smaller than the fabric.  See http://anic-lohas.blogspot.com/2010/07/sewing-notions-2-interfacing-focusing.html

4) If one section is not sewn properly, remove the thread carefully and sew again... :)  Don't give up...  :)

Though the inside is not very well sewn, I am still quite satisfy with the wallet.. first time, can't ask for too much..  :)


Most techniques mentioned in http://anic-lohas.blogspot.com/2010/07/wallet-project-part-2-looking-for-tips.html were helpful in completing this wallet.

My next project, turning this T-Shirt into a bag for my sister-inlaw.   Not as exciting as making a wallet, but I am a big fan of recycling, so, must do.. :)


Bye now..

Monday, July 26, 2010

Wallet Project - Part 3 (Wallet in making)

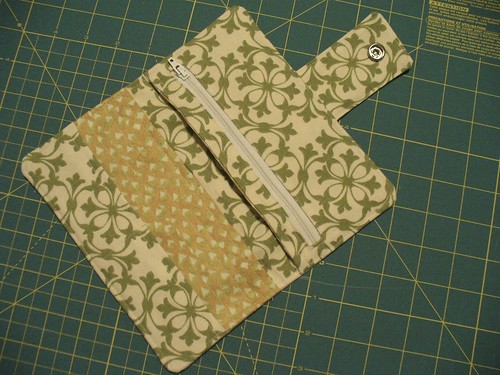
I finally start sewing, my first wallet.  Not done but almost there...

The lotus piece is from scrap I bought from myBotang..the brown dots & blue little flowers from FQ I got from the same place.  Took me awhile to match the pieces.


The snap tape should have been closer to the border so that it doesn't cover the pretty flower.  :(

Still need to attach bias tape but I fear the wrong bias tape will spoill it...

Still looking for the perfect match...  Any suggestions?


Inside, not so nice...


I used medium weight interface for the body only for the top & bottom body layer, light weight for everything else... Batting was also used for the body.. just to try and the one I have is too thick.

I suspect when we say medium weight, maybe different brands, their medium wieght is of different thickness.  Probably better to use gram to specify?

One other thing I learnt today, when applying snap I bought from Zila Kasim, before you knock the snap, better create a small hole on the fabric using the eyelet punch.  I have one which came with my Brother sewing machine, if you have a Brother sewing machine, you probably have one. 


Bye now

Updated 28th July :  Wallet completed and posted in http://anic-lohas.blogspot.com/2010/07/wallet-project-part-4-wallet-completed.html

Saturday, July 24, 2010

Wallet Project - Part 2 (Looking for Tips & Tricks)


1) Rethread a zipper pull
I saw some nice zipper pulls in Anna Patchwork and bought a pack of 4 (RM2.00) and was hoping one of the zips I have at home will work with them..   hehehe..  it fits very nicely with the metal zip (actually only the pull is metal, but that is how the shop people call it).
Here are the tutorials on how to do it:  
1) http://glass-beach.blogspot.com/2007/09/tutorial-how-to-re-thread-zipper-pull.html  
2)  http://handcrafts.blog.sohu.com/160225381.html

2) Hemming & corners
I have another cornering issue ( :) ), how to mitre the corners when I hem, and finally I found this useful tutorial!


 http://glass-beach.blogspot.com/2009/05/tutorial-hemming-cloth-napkins.html


3) Attaching Magnetic Snaps
I fear that the area where the snap is attached to, is easily torn....  so, have been researching and found these solutions:

(i) Use Interfacing to strengthen the snap area :
http://www.ehow.com/how_6054869_attach-purse-magnets.html

(ii) Use plastic canvas to strengthen the area
http://www.helloknitty.com

But where to buy this?   
I have seen suggestion of using transparent plastic sheet used in A4 book binding, I will look around at home to find something similar.
Updated 31 July:  should bend the prongs inward like (iii) so that they don't tear the fabric if you are not using a plastic canvas.


(iii) Use canvas,  felt or fabric scraps (double layer though)
http://www.warehousefabricsinc.com/blog/how-to-insert-a-magnetic-snap-into-a-bag/


4) Cutting and ironing Fusible interfacing
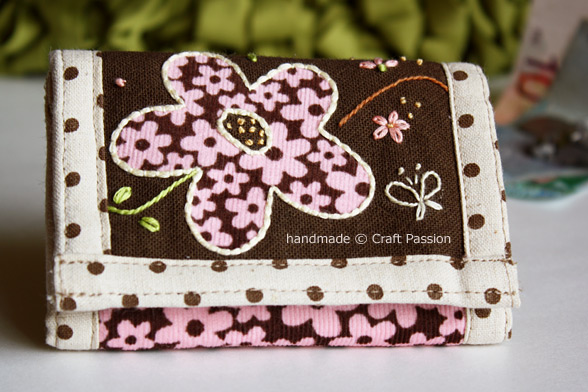
Craftpassion shared this tip:
http://www.craftpassion.com/2010/07/sewing-trifold-floral-wallet-tutorial-pattern.html


To read this tip, you need to know what are warp and weft.  I don't know what they are and have to look them up:

Excerpt from wikipedia:
"The warp threads run lengthways on the piece of cloth, and the weft runs across from side to side, across the bolt of cloth."

In short, the warp & weft of your fabric & interfacing should be cut & place so that they are opposite like the right image, this help maintain the shape of the wallet.


5) Attaching Bias Tape
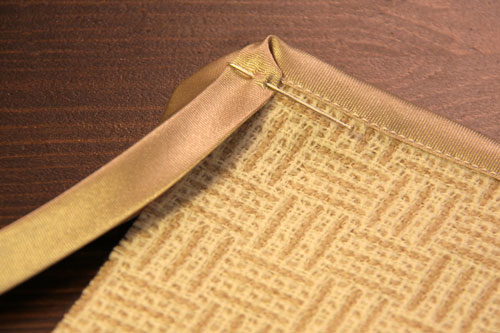
I have been wondering when we attach bias tape, what do we do at the corners.
deng... deng...
(i) http://sewtospeak.blogspot.com/2010/04/how-to-attach-bias-tape-with-mitered.html
(ii)  http://esewingworkshop.com/forum/bias-tape#comment-179


6) Making Bias Tape

http://www.savvyseams.com/techniques/biastape.php
This does not use a bias tape maker... Just fold the strip into half iron, and then half again for the left, iron, and do the same for the right...


I was looking at bias tape makers and they are not cheap..  about RM30 - RM40 each and you need different makers for different sizes.
I was hoping I could DIY myself and found this nice idea! DIY bias tape maker from a long needle, very creative.

http://creativelittledaisy.typepad.com/creative_little_daisy/2007/11/diy-version-of.html

But if you make bias tapes so often, probably good to invest one.  In case you wonder how it works..:) like me, check this out:
http://www.patemeadows.com/Using-Bias-Tape-Makers_ep_62.html


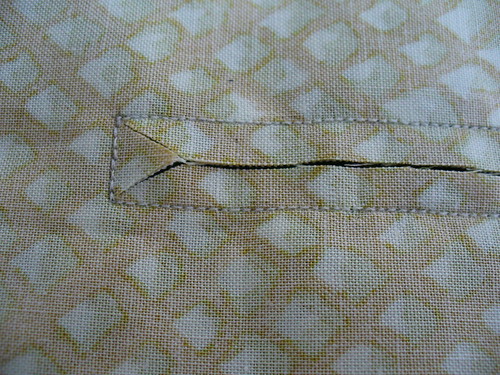
7) Making internal zipper pocket
(i)  http://www.craftpassion.com


(ii) http://myleisurecraft.blogspot.com   (in mandarin but a picture says a thousand words.. :) )


(iii)  http://elily00.wordpress.com/tutorials/wallet/
-- I like the idea of sewing the 4 sides before turning the fabric... easier to manage.


8) How to sew nice even seam allowances or top stitching


http://nicolemdesign.blogspot.com/2008/08/how-to-sew-with-nice-even-seam.html


9) Top Stitching Tips
http://keyka.typepad.com/my_weblog/2009/10/top-stitching-tips.html
(Thanks to Mila for sharing this.)

10) How to make smooth curves and sharp corners

http://www.makeit-loveit.com/2010/08/sewing-tips-clipping-corners-and-curves.html

My search continues... will be updating this page while I find the tips & tricks.. Stay tuned..

Dear Crafters of the above links,
Thank you very much for sharing these useful tutorials,  let me know if you don't want to be linked..  Sorry that I didn't first ask for permission...

Friday, July 23, 2010

Wallet Project - Part 1 (Looking for Tutorials)

I have been thinking to make wallet and have looked around for tutorials and found these useful links: 

1)  http://verypurpleperson.com/2009/10/wallet-tutorial.html
finished size when folded: 21x10 cm  (8.5"x4")
finished size when opened: 21x20 cm (8.5"x8")
2 full width pockets
1 zippered pocket
6 card slots
(Azaidris used light weigth interface for card slots and medium weigth for wallet body and it worked well.)


2) Trifold Floral Wallet  - http://www.craftpassion.com/2010/07/sewing-trifold-floral-wallet-tutorial-pattern.html

This has a section on "Tips on cutting and ironing fusible interfacing".  Suggest you read before making any wallet.  :)


3) http://elily00.wordpress.com/tutorials/wallet/ 
With instruction on how to sew zip.   It used turn & top stitch technique.


4) Quilted Wallet - http://darnkat.wordpress.com/quilted-fabric-wallet-tutorial/

Looks like it is about the same size as 1) but without zippered pocket, 6 card slots, 4 half width pockets and 2 full width pockets.

(Azaidris used heavy cotton so she didn't use batting and it turned out great.)

5) Supercool Wallet - http://www.craftbits.com/project/super-cool-wallet


6) http://bluebirdswing.blogspot.com/2010/06/my-very-first-tutorial-lets-make-wallet.html

Similar size as 1) but tri-fold.  1 zippered pocket and similar card holders as 3).
7) http://noodleheads.blogspot.com/2009/10/zippy-wallet-tutorial.html

Zip closure with external pocket.   I have looked a few times, didn't find card pockets.


8) http://nadscraft.blogspot.com/2010/05/tutorial-tri-fold-wallet.html
 (thanks to nojie#craft for reminding me of this post, her experience is to use the thinnest interfacing.)


9) http://sewchristine.blogspot.com/2008/03/walletpurse-with-coin-compartment.html


10) Mandarin tutorial here:  http://www.pinbu.com/?uid-276569-action-viewspace-itemid-110269  with additional notes in English here:  http://anic-lohas.blogspot.com/2011/07/sew-along-patchwork-wallet-week-2.html


Many more links here but I haven't looked carefully yet:
http://www.craftster.org/forum/index.php?board=349.0

Dear Crafters of the above links,
Thank you very much for sharing these useful tutorials,  let me know if you don't want to be linked..  Sorry that I didn't first ask for permission...

Sunday, July 18, 2010

DIY Baju Kurung - Part 1

I bought a Brother sewing machine from LSN and they gave free baju kurung classes...  Can't waste it and good to build up sewing skill. 

So I went for 2 classes and with the notes from http://naninana.tripod.com/, I managed to get the baju kurung till this stage:

Quite happy with the result.  Still need to figure out how to do the balut.   Probably have to go back to class...

Link Within

Related Posts with Thumbnails