Pages

Ladies, if you haven't heard about environmental friendly reusable menstrual products, please read posts on Cloth pads & cups...

Sunday, August 29, 2010

DIY Cloth Pad - Part 7 (Zorb)

 
 I sewn 2 cloth pads this morning.
One of them will be given to a colleague as farewell gift.   Not sure if she will take it alright but I thought this is the best gift I could give her.    I will attach a nice leaflet about reusable menstrual product plus instructions on how to use and wash.   Hope she won’t faint after opening the gift. 


How about you?  If you receive a cloth pad as a gift, how would you take it if you are not already a cloth pad user?

The top is suede cloth from US which a friend brought it back for me.    Inside, it is a layer of flannel & a layer of Zorb.  A layer of flannel is added between the top and Zorb so that I could sew channel in the middle without sewing through the Zorb.

Zorb is specially designed by Wazoodle for diapers making.  It is very absorbent and absorbs quickly.  It also dries quicker than other comparable material.  I washed the 2 pads this morning and they are almost dry now. (at 2pm).  It is very good if you want to make a heavy flow pad but do not want the thickness.  :)  Oh..  I must tell you how long it took for the items to arrive from Wazoodle, Canada.  More than 2 months by surface mail.  I thought they will never arrive...   If you would like to try out Zorb, I am happy to share some with you at cost plus postage from Canada & to you.

The bottom is a sandwiched PUL I bought from niceclothdiaper when they have 50% sale.  It is really a bit thick to be used as a hidden layer, so I just used it as bottom.

I read that suede cloth is good to wick away moisture.  When I did a test on the pad, it took 20ml water quickly and the top still feel dry when I touched it.  BTW, I read that a super-plus size Tampon takes up to 15 ml.  So 20 ml is really a lot...

Updated 4th Oct:  I think using both suede cloth & sandwiched PUL will make the user sweat, will have to try the suede cloth with micro-fleece or single PUL and see if it is less hot..  I like to have water proof for the pads I sew for new users as I don't want them to have leaking problems and have bad experience with cloth pads.  It is meant to encourage them to use cloth pad rather than driving them away..

What is Zorb?  Check out this link for more information.   Quoting a few key notes here:

Zorb contains only tangled cellulose fibers from bamboo/cotton/viscose and poly micro fiber, the same fibers found in virtually every AIO diaper on the market – nothing else. These non-allergenic fibers are non-allergenic, durable and easy to sanitize.  We manufacture Zorb in the USA and Canadian in modern facilities that are safe & friendly for workers and the environment.
 
For a head to head comparison on thickness, stacking Zorb on a desk against the common fabrics will show you something like this.  1 layer of Zorb is the same as:
•    3 layers of flannel
•    2.25 layers of French terry
•    1.3 layers of cotton fleece
•    1 layer of sherpa.
 
Now, to get the same absorbency, as 2 layer of Zorb, you will need:
•    8 layers of flannel
•    6 layers of French terry
•    5 layers of cotton fleece
•    4 layers of sherpa.

Feedback about Zorb by some cloth pads makers & users:
http://community.livejournal.com/cloth_pads/711850.html

I found a plastic version of traditional sew on snap, another possible fastening method:


If you are new to cloth pads, please read my other posting on Cloth Pads.

Saturday, August 28, 2010

Patchwork Wristlet

I saw Pink Penguin's cute patchwork wristlet and was inspired to make one.. 

So, I took out the scrap I have and started cutting and matching them.  Something quite pink..  :)


I have fun making this and maybe you would also like to try.   Pink Penguin's tutorial is quite detail, check out her site.  :)

Bye now and have a wonderful weekend.

Tuesday, August 24, 2010

Kitty Applique Coin Purse Project - Part 2 (Quilting Technique)


Finally I completed this kitty coin purse.  It was almost fully hand sewn except the seam which I sewn it with machine.  Regretted! :(   I looked at some other similar material craft work and the seam without stitch line shown is nicer..

My first piece of quilting craft.  As expected, work of beginner without quilting technique.  The thread was not pull tight enough and stitches length not even and too big.   Never mind.
 
Below are links I found useful but I read them too late:

1) http://sentimentalstitches.net/instructions/hand-quilting/
A good overview on hand quilting

2) http://annamariahorner.blogspot.com/2010/03/stitch.html
I learnt how to hide the knot from here.   Basically make a knot and then gently tug it through the first layer of fabric.

3) http://www.threadsmagazine.com/item/3734/perfect-your-hand-quilting-stitch
Haven't figured out if the technique shown could be used when a hoop is not used.  


I am now doing a blanket stitch to the side of the zip to make it neater....


Thanks to the above link owners for sharing their knowledge...

Previous post about this project:
http://anic-lohas.blogspot.com/2010/08/kitty-applique-coin-purse-project.html

Saturday, August 21, 2010

Kitty Applique Coin Purse Project - Part 1 (Applique Technique)


A very good morning...

I have been doing this small project for a few days now, a little at a time, during my way to office, in the late evening after work... finally this morning, I finished the last bit of the kitties.

I wanted to learn applique quilting, even though I have not even done quilting before.  So, I bought this kitty applique coin purse kit online as I thought it will give me all the instructions I need.   My expectation was wrong.  It was not really for beginner like me who has never done one before.   Luckily the stitch names are there in the brief instructions provided, so I could ask my good friend, Mr Google what they are :).   I went searching and found tutorials for the stitches I need:

1) Needle Turn Applique Stitch - To sew the applique to the background without showing the stitch
http://appliquetoday.blogspot.com/2008/04/needleturn-applique-stitching-tutorial.html 

There is an easier way of doing this if the applique is large.  Sew the outline with wide stitch and then pull the thread so that the seam gathered underneath and sew it the same way as above.  I have only read the instructions but haven't tried it:
http://www.sewlover.com/basic/applique_technique.html

Another tutorial: http://www.360doc.com/content/10/0929/09/69678_57231974.shtml

2) Fly Stitch for the nose & mouth

http://inaminuteago.com/stitchdict/stitch/fly.html

3) Outline Stitch - for the leg & moustache
http://stitchschool.blogspot.com/2009/12/stitch-school-stem-and-outline-stitch.html

Here is a handy stitch dictionary I found:
http://inaminuteago.com/stitchindex.html

Thanks to the link owners for sharing the information, otherwise I won't be able to complete the kitties. 

Bye now and have a wonderful weekend.http://www.360doc.com/content/10/0929/09/69678_57231974.shtml

Wednesday, August 18, 2010

Sewing Notions 8 - DIY Thread Bobbin Card


My newly made bobbin cards..  made from old business cards I collected from friends for recycling purposes.  :) 

I bought some embroidery thread from feltralicious sometime back.   After I cut the length I need, there are 6 strands and I normally use a few strands and there is always some left.  I wanted to store them neatly and saw this nice printable bobbin card by Wild Olive:
http://wildolive.blogspot.com/2009/11/printable-thread-bobbins.html

I found the link through:
http://freebiesforcrafters.blogspot.com:   

(Thank you for sharing this)

I printed out the pdf file, simply cut and glued them to the old business cards to increase the thickness.   I then cut out each bobbin.  The bobbin cards are cute and easy to make..  and cost almost nothing..  :)

Similar formula for storing the laces & ribbon.. recycling cardboard...

Sunday, August 15, 2010

Frame Coin Purse


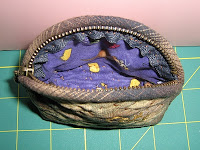
I made my first frame purse.. hooray.. ! :)   A mini one.  The purse frame is 6.5 cm.  The cover fabric is a gift I received from a craft seller.  :)   Why did I choose this frame?  Because it was the cheapest I could find.   I want to try out making a frame purse but I don’t want to spend a lot of money.  :) 


I found below patterns available for download.  These are patterns for different sizes of frame.  Very convenient. :)
1) 2 pieces of cover fabrics like the one I have made. 
http://www.sewlover.com/PDF/bag/2patch_frame_pouch_pattern.pdf

2) 4 pieces of cover fabrics:
http://www.sewlover.com/PDF/bag/curve_frame_purse_pattern.pdf

The patterns are in PDF and print them in scale of 97%.   For scaling, look for something like “reduce/enlarge to” in the printer setting.

The above links are provided by the tutorials below:
1) 4 pieces of cover fabrics:
http://www.sewlover.com/bags/tutorial/curve_frame_purse.html
This tutorial provides the instruction on how to attach the frame.

2) 2 pieces of cover fabrics, simplest to make:
http://www.sewlover.com/bags/pattern/2patch_frame_pouch_pattern.html
I made mine according to this but for attaching the frame,  please see 1 above.

Here is one in English that shows how to attach the frame:
http://cottonandcloud.com/blog/how-to-attach-a-purse-onto-a-sew-on-frame-crochet-purse-tutorial/

The last step of this tutorial is to clamp end of the frame which was not there in the sewlover tutorial.
In addition,  sewlover tutorial attach the frame from the middle of the frame (which I used, and I think this will ensure balance of both sides) but this one start from the side. 

Here is a list of online sellers who sell purse frames:
1) http://hong2lee.blogspot.com
2) http://craftgallery4u.blogspot.com
3) http://emma36handmade.blogspot.com
4) http://cforum2.cari.com.my/redirect.php?goto=findpost&ptid=1958360&pid=74941269
5) http://homegalhandmade.blogspot.com/search/label/purse%20frame
6) Daiso, The Curve - 5cm x 2 at RM5.00 (Thanks to Sueann for sharing this.) 

The frame I bought has holes.  How about frames without holes?  Here are nice tutorials for that:
1) http://u-handbag.typepad.com/uhandblog/2006/12/purse_frames_de.html
2) http://www.purlbee.com/cute-japanese-coin-purse/


Thanks to the crafters who have shared the above tutorials..

Bye now and have a great Sunday.

Saturday, August 14, 2010

Blogger Tips 2 - Blogger Live Stats

Do you know who visits your blog?  which post is most popular?  where does the traffic come from?  which search keyword has sent them to you? which browser they use? which country they are from? etc.....

New feature added in July...  Blogger Stats

If you login to http://draft.blogger.com/home, you will see an additional tab added, the red circle below:


You don't have to configure anythig, just click the "Stats" and you will see your blog's traffic in near real time..

Really cool...

It is all quite self explanatory..  So, I won't explain more.   If you need help,  let me knew.   Have fun.

More information is available from:
http://bloggerindraft.blogspot.com/2010/07/introducing-blogger-stats.html

Thursday, August 12, 2010

Health Tips 3 - Triphala ("three fruits")


Have you heard about Triphala?   It is a few Ringgit for a small bottle but it is very good for cleansing the body, so I thought I should share this with you, in case you haven't heard.  It is used in traditional Ayurvedic medicine.. Don’t worry about the Ayurvedic medicine,  just use Triphala as it is cheap but very beneficial.   You should be able to find it in some traditional Indian stores.  It is easily available from "Modern Store" in Jalan Brickfield, next to CIMB bank.

I normally buy the powder form as it is a lot cheaper compared to the tablets form.
It is made from:
1) Amalaki (Emblica officinalis)
2) Bibhitaki (Terminalia bellirica)
3) Haritaki (Terminalia chebula)

What is the benefit of Triphala?  In my own words:
1)    Help you go to toilet..  :)  but it is not so bad that you have to run to toilet..  So your toilet habit will be regular.
2)    If you have congested colon, of course this will be useful.
3)    If you have lots of fried food, this cool down your body.
4)    It helps remove toxin from your body.


To describe the benefit more professionally, here are words I borrowed from Wikipedia:
In traditional Ayurvedic medicine, Triphala is used for:

    * immune system stimulation
    * improvement of digestion
    * relief of constipation
    * gastrointestinal tract cleansing
    * relief of gas
    * treatment of diabetes
    * treatment of eye disease

For more reading, please see:
http://www.organicindia.com/triphala.php

Hope this help...

Wednesday, August 11, 2010

Sewing Notions 7 - My First Fabric Button


With little time I have tonight, this is what I could do..  :)   my first fabric button..  :)   It is from linen scrap I bought from MyBotang.     The button is not in perfect round, because the fabric was not big enough to be pulled to the centre properly.    I didn't use a kit.

Here is a link to a tutorial which use a cover button without a kit:
http://www.craftpudding.com/2007/06/covered-button-tutorial.html

This one doesn't even need a cover button, just use something round:
http://www.cutoutandkeep.net/projects/diy_fabric_buttons

Thanks to the link owners for sharing the tutorial.


Where to get cover buttons, please see my previous post:
http://anic-lohas.blogspot.com/2010/08/craft-coop-coverfabric-buttons-tool-kit.html

Sunday, August 8, 2010

Wallet Project - Part 5 (Another Wallet - Heavy cotton attempt)

Today I wanted to sew a wallet with heavy cotton..  half way through I realise that it will not work out.  It is just too thick for my wallet pattern.   Each side of my wallet that could be seen has a right side, this means that the zip pocket itself will have 4 layers of fabric.   I was thinking maybe I could use it as cover; even then it is too thick.  Oh well, so I ended using almost middle weight cotton for everything except 2 layers.   The wallet was too thick for turn & top stitch.  So I used seam instead to cover the sides.


I am not happy with the seam and will be removing it and re-sew.  

I also couldn’t do top stitch in perfect straight line and has gone looking for tips and found this :) :
http://nicolemdesign.blogspot.com/2008/08/how-to-sew-with-nice-even-seam.html  (Thanks to the link owner for sharing this).


The zip was initially sewn nicely  in the middle of the pocket, but it ended up as the above, a bit to the right side as I have to cut away a couple mm to make all the layers even.

While I was happy with the result but when I checked the back... aiyoh..  so careless the back piece was accidentally sewn together with the zip.  I have to remove the thread and re-sew..  :(


The left are the heavy cotton pieces that I abandoned which were meant to use as cover.    In the process of making this wallet, I broke 2 sewing machine needles and lost a few drops of blood.  The needle accidentally poked my finger while I was basting the seam.  :(

I was wondering before what this little thing on the right picture is for, but now I have the experience of using it and found the name for it, the Thimble.


For more information on wallet making, please see my other wallet making posts.

Saturday, August 7, 2010

Sewing Notions 6 - Cover/Fabric Buttons Tool Kit & Refill

Hi All,

I saw this fabric button tool kit from a Taiwan website (http://grass-es.blogspot.com) and the price is affordable.   She has size of 18mm, 22mm, 27mm, 38mm.   It is RM5.2 per set with a few button sets included.

Fabric button tool kit is also available from local sellers:
1) http://cutieyfelt.blogspot.com/2010/04/blog-post_30.html 
2) http://sayunk.blogspot.com/2010/08/cover-button.html
3) http://fabricfanatics.blogspot.com/2010/08/043-blank-button-cover-and-tools-re.html

There are also small quantity refills from:
1) 28 mm - http://hong2lee.blogspot.com/2010/08/button-f130-fabric-button-casing-28cm.html
2) 13 mm - http://kawaiistations.blogspot.com/2010/07/button-mold-13cm.html
3) 1, 2.5, 3, 4 cm - http://heart-handy.blogspot.com/2010/07/wrap-button.html 

But you could also make fabric buttons without a kit.   Here is a link to a tutorial:
http://www.craftpudding.com/2007/06/covered-button-tutorial.htm

Thanks to the link owner for sharing this tutorial.

Thursday, August 5, 2010

Sewing Notions 5 - Zip (for bags/wallets)


I see crafters use zips with very nice pull and was thinking where do they get them?  

Finally..  I went searching...

They came with nice pull rather than those boring ones I bought...  (see my other post: http://anic-lohas.blogspot.com/2010/07/sewing-notions-1-zips.html)

But I found these sites where you can buy them from..  and of course there are probably more out there.  I will update the list when I find them.

http://sewinglife-shop.blogspot.com/2010/07/ykk_30.html  --  available in 11 lengths from 10 cm to 40 cm

Good price, preorder and receive zips after mid August: 

http://heart-handy.blogspot.com/search/label/Material  - Available in 7 lenghts from 10 cm (RM2.8) to 30 cm (RM4.2)

See what she has on her site...

Many zip pull choices.:

very nice but many designs no stock..  


I am collecting zips for my next few projects... :)

Hope this information helps those who are looking for nice zips.

Btw, if you know of other places, would be nice if you leave a message...  Thanking you in advance.. :)


Wednesday, August 4, 2010

Health Tips 2 - Grape seeds


I ate grapes the other day and was chewing the seeds..  I thought that I should share this little piece of information not commonly known.   Grape seeds are high anti-oxidant, so shouldn't spit them out...:)  Should chew and swallow them together with other nice part of the grapes..

If you are eating a lot of grapes, it maybe too much chewing but try to do as much as you can... :)   I was eating a lot of grapes the other day and was tired of chewing..  :)  They were rotting... so need to eat them fast..

So what is so great about Grape Seeds?
1)  Grape seeds contain high concentration of Vitamin E, flavonoids, linoleic acid, and oligomeric proanthocyanidin complexes (OPCs, powerful as anti-oxidant).   Anti-oxidants are substances that destroy free radicals, harmful compounds in the body that damage DNA.      They could help treat heart disease to cancer, aging skin, although scientific evidence is mostly lacking for these.  However, there is good evidence that grape seed extract can help treat chronic venous insufficiency and edema.  See http://www.umm.edu/altmed/articles/grape-seed-000254.htm

2) Eating grape seeds may help combat degenerative brain conditions such as Alzheimer's disease.   http://www.ibtimes.com/contents/20100415/grape-seeds-demetia-alzheimer-amyloid-deposits.htm


So...  before you throw out grape seeds...  think twice..  :)

Tuesday, August 3, 2010

Blogger Tips 1 - Spam Messages in cbox Message Box

Yesterday a similar message appeared in my message box on my blog:

I really don't like my message box being crowded by advertisement or spam messages as I may miss messages for me, so I login to cbox website and see if I could delete them.

I was delighted that I was not just able to delete the message, there was also a feature in cbox that I could block users.  Luckily cbox has enabled this for their free service.  See the following screen:
Tick the message/sender you would like to delete/ban, then click the Ban/Delete option on top.


To block a sender, you could also go to the "Blocked users" options, and add the sender there.


On the "Blocked users" screen, you could specify how long you would like the user to be blocked.  Choose the "Change expiry" option to do this.  The default setting is 1 week if you don't change it.

Please take note that, the blocking is done based on IP address, so when the users' IP address changed, then the user is able to post message again.

I think a better way could be using the filtering option, however this is only provided to paid service.  I could not access it and hence not able to check how it works.

In addition to the above, in case you are not aware, there are a few options on the Options screen that you may want to change them if you haven't.   The first thing I did was to change the length of the message allowed in the message box from 100 to 200.  That is the max for free service.


Not all options are available for the free service but I am happy with what it has offered.

Hope this help bloggers who are annoyed by spam messages.

Thanks to cbox for providing this service free.

Bye now...

Monday, August 2, 2010

Sewing Notions 4 - Metal Snap Button Tool

Hi all,

I have a set of metal snap button tool kit and I am happily using it to attach snaps to my work.


How to use?   Links are shared after the list of suppliers


However, I found other alternative suppliers and couldn't resist..   I have to share the available options I found so far:

0) Craft Buddy
Tool kit for snap button 633 with 2.5mm eyelet punch, RM18 per set - no snap buttons included.
http://craftybuddy.blogspot.com/2011/05/tol001-snap-button-633-toolkit.html

A set of 3 pieces of metal plus 10 snap button sets - RM50 per set (3 sizes, not sure exactly the diameter).

25 snap buttons at RM10.   This is the first snap button tool set I found and bought, though not the cheapest in the market, but I appreciate it that I found it easily and no need go searching for it...


Same set as (1) but without any snap buttons:
http://hong2lee.blogspot.com/2011/04/o26-snap-buttons-tool-633-633.html  (RM28 per set but take note that it does not include any snap buttons.)

(I think 831 is for snap size 15mm, 633 is for size 12mm)

This site also has all the different sizes of eyelet punch (tool to make a hole) that you may need at affordable price.  A 2mm eyelet punch at RM2.5.

I have a 2-in-1 Eyelet Plier for Punch & Eyelet and I tried to punch a hole in fabric using it and it didn't get through, so I bought an eyelet punch of 4mm from this site.  I am a bit regret with this eyelet plier as I really prefer hammering rather than pressing using my hand!  My hands don't have so much strenght. 

3) Kawaii Station - sold out (updated 15 May 2011)
It has several attractive options.   If I haven't bought anything, I may have gone for this complete tool set:
http://kawaiistations.blogspot.com/2010/07/snap-button-tool-complete-set.html  (this include 2 sizes of snap tools, eyelet as well and some other stuff that I haven't worked out what it is for.)

Of course you could also go for just one size snap tool:
http://kawaiistations.blogspot.com/2010/07/snap-button-tool-set-633.html  (RM28 per set, again doesn't come with snap buttons)

These tools don't look like the same material as in No 1) & No 2).

4) My handmade station - sold out (updated 15 May 2011)
This site provides snap button and the cover has some design (not the smooth type).   Snap button tool with 5 snap buttons and postage included at RM28.  Check it out at : http://myhandmadestation.blogspot.com/2010/05/snap-button-sets-tools-buttons.html

It also has tool for prong snap button though all sold out now:

http://myhandmadestation.blogspot.com/2010/07/ring-snap-prong-button-tool-set-mhs004.html

5) Sewing Life 
2 pieces 13 mm snap tool at RM7, check it out (sold out):
http://sewinglife-shop.blogspot.com/2010/06/10mm.html

13 mm snap button: http://sewinglife-shop.blogspot.com/2011/04/13mm_30.html

Snap prong buttons are available from for the price RM5 per packet of 6 buttons.

~~~~~~~~~~~~~~~~~~~~~~~~~~~~~~~~~~~~~

Ok.. for those who don't know how to use snap tool, please see here:
1) http://www.zilakasim.com/tutorial/tutorial-snap-button/ (Remember to make a hole first, before attaching the snap. A reminder as this tutorial does not show this step)

2) http://emma36handmade.blogspot.com/2010/04/blog-post_22.html  (In mandarin, but a picture says a thousand words.. :) )

A big thank you to the link owners for sharing the knowledge....

~~~~~~~~~~~~~~~~~~~~~~~~~~~~~~~~~~~~~


I have listed the prices for your convenience; please do not scold the suppliers with higher prices as the quality of the goods and their cost maybe different.


Bye now and I wish you a happy day today...

Anic

Link Within

Related Posts with Thumbnails