Pages

Ladies, if you haven't heard about environmental friendly reusable menstrual products, please read posts on Cloth pads & cups...

Saturday, July 31, 2010

Bag Project 2 - T-Shirt Bag with Magnetic Snap

I sewed another T-Shirt bag.. 

For instruction, please see link posted in my previous post.  

It was sewn from the below T-Shirt from my sister in-law.   Too small for me and decided to turn it into a bag for her.

I have attached a magnetic snap for the bag following the instruction link posted in http://anic-lohas.blogspot.com/2010/07/wallet-project-part-2-looking-for-tips.html.   The lining is also from T-Shirts and I have strengthened the magnetic snap area with a strip from a thicker T-Shirt.


If you have old T-Shirts and can't find a new owner for them..   this is a good way to give them a new life.   :)

Thanks to all the wonderful people who have shared their experiences and the nice tutorials.

Wednesday, July 28, 2010

Wallet Project - Part 4 (Wallet completed)

Continue from Wallet Project - Part 3...

Finally I decided to use the same fabric as bias tape..  I couldn't find anything that looks matching from my stash of fabrics (not that I have many).


What I learnt from this project:

1)  Before pressing the snap button, should make a very small hole using eyelet punch.   I have also strengthened the snap area with an additional layer of fabric.

These 2 tutorials in combination give me a complete picture of attaching snap button:

(i) http://emma36handmade.blogspot.com/2010/04/blog-post_22.html - this show the step of puching a small hole clearly.  For Brother sewing machine owner, you should already have a eyelet punch in the set of tools came with the sewing machine.

(ii) http://www.zilakasim.com/tutorial/tutorial-snap-button/  (found alternatives for snap tool 1 & 2, check out you maybe overjoy with good price).

2)  Baste the bias tape before sewing, though it takes a bit more time, but the result will be a lot neater.  Actually anywhere which it is hard to sew, it will make it a lot easier, rather than trial and error using the machine.

3) Cut the interfacing piece smaller than the fabric.  See http://anic-lohas.blogspot.com/2010/07/sewing-notions-2-interfacing-focusing.html

4) If one section is not sewn properly, remove the thread carefully and sew again... :)  Don't give up...  :)

Though the inside is not very well sewn, I am still quite satisfy with the wallet.. first time, can't ask for too much..  :)


Most techniques mentioned in http://anic-lohas.blogspot.com/2010/07/wallet-project-part-2-looking-for-tips.html were helpful in completing this wallet.

My next project, turning this T-Shirt into a bag for my sister-inlaw.   Not as exciting as making a wallet, but I am a big fan of recycling, so, must do.. :)


Bye now..

Tuesday, July 27, 2010

Health Tips 1 - Seaweed Jelly (Good collagen source)

I am taking a little break from sewing..  :)    A short post about something I use in my cooking which is very rich in calcium, collagen and other minerals. 

Seaweed Jelly is actually Eucheuma Seaweed.   Some peope call it Sea Bird's Nest.  Apparently it's collagen content is 10 times higher than bird's nest (but a lot cheaper than bird's nest) and it's calsium content is 37 higher than fish liver.  A packet of Seaweed Jelly (can't remember the weight) is a few RM in organic shop.  Not a big packet but you get quite a lot of seaweed jelly.   I haven't checked out at other shop.

Collagen is very popular as the solution for a younger looking, wrinkles-free skin. :)  Around 75% of our skin is made of collagen.  It is also important for many parts of the body to function properly such as bones, muscles, tendons, ligaments, etc..

One seller said:  "SEA BIRD'S NEST" is called ladies' cosmetic food as it helps to improve skin care and hair fall problem.  If consume continuously everyday, it can reduce Wrinkles, Black spot, freckles, Acnes and sensitivity symptoms.  (Really?  I better eat frequently.. :) )

But I eat it not for skin care instead I am hoping that I am able to maintain a healthy level of collagen in the body..  age is catching up.. :)


This is how it looks like.
You need to soak it so that it becomes jelly like looking.


What can you make from this jelly?  I don't have fanciful recipe, I just add them to my noodle soup as what I need is the nutrition.. :)
It melts if you add it to hot soup or boil it.   So, if you want to have something to bite, add it when the soup is not so hot.


Of course, there are better recipes.  A few nice ones:

1) Add it to your red bean/green bean soup, add after the soup is not so hot, otherwise it melts.

2)  Drinks:
Antioxidant Booster: http://sennyong.blogspot.com/2009/08/eucheuma-seaweed-my-antioxidant-booster.html
This one is easy to make: http://crystalbyblog.blogspot.com/2008/06/sea-birdnest-funori-drink.html


3) Sweet & Sour Eucheuma Seaweed Salad - http://www.greenborneo.com/chinesefoods/index.php?action=select&page=recipes&list_id=125&entry_id=48

4) Simply salad - http://sennyong.blogspot.com/2009/08/san-hu-cao-eucheuma-seaweed.html


5) Longan Red Dates Sea Coconut Eucheuma Drink - http://sennyong.blogspot.com/2009/08/sea-bird-nest-dessert-and-drink.html


Don't miss out this affordable collagen supplement, try it out...  :)
 
Thanks to the owners of the above links for sharing the recipes.

Oh.. it supposed to be a short post but ended up quite long..

Monday, July 26, 2010

Sewing Notions 3 - Interfacing (Focusing on Bag)

I searched on the internet a bit more on the topic of interfacing for bags/wallets,  found a good site related to bag making, by Lisa Lam at U-handbag:


1)  Interfacing & Interlining De-mystified
  http://u-handbag.typepad.com/uhandblog/2007/01/interfacinginte.html
 
Lisa explained which interfacing goes well with which fabric.  She also shared how to avoid bulk at the seam (the same as si kurus suggested) and why use a lighter fusible interfacing than the bag's fabric.  (It is so that any creases made due to normal bag use will not show up in the bag! this does not happen to sewn in interfacing though..)

Another very good link about interfacings in bag making:
http://nicolemdesign.blogspot.com/2010/08/combining-interfacings-for-bag-making.html

2) Choosing Fabrics & Interfacings
http://u-handbag.typepad.com/uhandblog/2009/01/bag-making-for-newbies-part-2---choosing-fabrics-interfacings.html


She provided suggestion of fabric and interfacing combo, here is an example, checked out her post for more combo suggestions:

Bag Type = Firm structure boxy handbag
Fabric = Quilt weight cotton
Interfacings = Medium Fusible on all bag parts and some stiff Ultra Firm Fusible on the exterior and Heavy Sew-in in between the exterior and the lining fabric, also there is a stiff grid bag bottom on the base.


There are many good posts on bag making for beginners:
1) If you wonder the meaning of the terms such as Right/wrong side out, Seam allowance etc used in the bag making instructions, see this:
http://u-handbag.typepad.com/uhandblog/2009/01/bag-making-for-newbies-part-1-sewing-terms.html

2) How to strengthen - reinforce - or beef up your handbags and purses

http://u-handbag.typepad.com/uhandblog/2007/04/ahhh_grasshoppe.html


3) Machine Needle know-how
http://u-handbag.typepad.com/uhandblog/2010/06/bag-making-for-newbies-part-3-machine-needle-knowhow.html


Many more good stuff, check out her blog...

Thanks to Lisa for sharing her experiences and knowledge...

Happy reading...

Wallet Project - Part 3 (Wallet in making)

I finally start sewing, my first wallet.  Not done but almost there...

The lotus piece is from scrap I bought from myBotang..the brown dots & blue little flowers from FQ I got from the same place.  Took me awhile to match the pieces.


The snap tape should have been closer to the border so that it doesn't cover the pretty flower.  :(

Still need to attach bias tape but I fear the wrong bias tape will spoill it...

Still looking for the perfect match...  Any suggestions?


Inside, not so nice...


I used medium weight interface for the body only for the top & bottom body layer, light weight for everything else... Batting was also used for the body.. just to try and the one I have is too thick.

I suspect when we say medium weight, maybe different brands, their medium wieght is of different thickness.  Probably better to use gram to specify?

One other thing I learnt today, when applying snap I bought from Zila Kasim, before you knock the snap, better create a small hole on the fabric using the eyelet punch.  I have one which came with my Brother sewing machine, if you have a Brother sewing machine, you probably have one. 


Bye now

Updated 28th July :  Wallet completed and posted in http://anic-lohas.blogspot.com/2010/07/wallet-project-part-4-wallet-completed.html

Sunday, July 25, 2010

Sewing Notions 2 - Interfacing (Basic Info & How to Apply)

I don't know if interfacing is considered as part of sewing notions.. but never mind, I like it this way so that my posts are organised nicely.


For newbie on the journey of sewing:

1) What is interfacing and the different types of interfacing?
Interfacing is either fusible or non-fusible and it is either woven, non-woven, or knit.
It is an extra layer of fabric that provides shape, support, stiffness and reinforcement.

Read more at:
http://www.fabriclandwest.com/Notion_basics/Interfacing/interfacing.htm#options


I figured the interfacing I normally bought from the shop here is called fusible non woven interfacing.  They are either light, medium or heavy weight. So far, I have only tried light (RM2.0 per meter) & medium weight (RM2.2 per meter).

It is called Kertas Gam but actually it is not made of Kertas! Before this morning, I thought it is really "kertas yang disapu dengan gam".  hehhe..  I even thought that the gum will dissolve in water so it should stay dry before use though I wonder what happen when we wash the cloths which use "Kertas Gam".   I was ignorant..

I soaked a small piece of the interfacing I have and it is still strong when it is wet and of course no gum came out.  :)


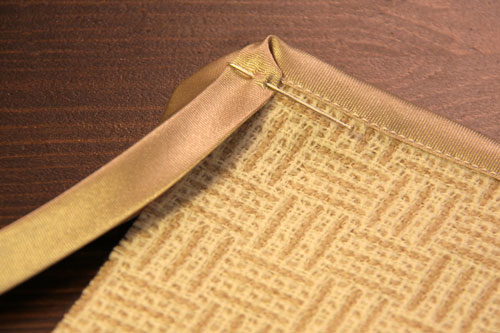
I have also bought non fusible non woven heavy weight interfacing before, used for collars.  I think this is "Kertas Keras", if I am wrong please let me know.   I have cut a strip for my yet to sew Balut (form part of the waistline of the long skirt of Baju Kurung).  This is also available in long strip at the shop sold by meter.  But to save cost,  I cut it from my big piece of Kertas Keras.

But then, these are only 2 types of interfacing material. If you read the above link, there are many types.

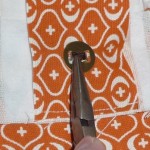
At the shop, you will see the different weight of interfacing rolls standing at one corner of the shop.

2) How do you choose which interfacing to use?
http://www.fabriclandwest.com/Notion_basics/Interfacing/interfacing.htm#choosing

As a general rule of thumb, choose one which is lighter than the fabric and with similar care requirement.   Beware that fusible interfacing is not for all fabrics.

Here is a nice chart that categorises the fabrics into weight categories and the type of interfacing to use:
http://www.fabriclandwest.com/Notion_basics/Interfacing/interfacing_chart.htm

3) How to apply fusible interfacing? 

In the past, I happily slide the iron on the interfacing directly..  erhh...  this morning I learnt that:

(i) Steam the interfacing first to preshrink it.  Assuming you have an iron with steam coming out :) , hold it over the interfacing not touching it for a few seconds.  If you don't have steam iron or you are very hardworking, then prewash, please see here: http://sewing.lifetips.com/tip/69341/fabric/interfacing/preshrink-fusible-interfacing.html.

(ii) Use a press cloth and spray water to dampen it evenly (not soaking wet).  Put the press cloth on top of the interfacing, use a little higher heat than what is required by the fabric.  Apply pressure for about 10 seconds for light weight and slightly longer for heavier weight.  Other than heat, one other key success factor is pressure.  So, if your ironing board is too high, this can be difficult and tiring, lower down your ironing board.  

(iii) DON'T slide, press and lift... aiyoh should have learnt this long ago, no wonder my piece of fabric that I ironed the interfacing on, become bigger as it was stretched and glued onto the interfacing..  :(

(iv) Baste the interfacing and fabric by touching it in several places with the tip of your iron.  This will bond the interfacing to your fabric lightly so that it won't shift.  BTW, the shining side is the side which will stick.

(v) Patience and don't lift your fabric piece before it is completely cooled, otherwise the bonding process maybe affected.

(vi) For an expensive piece of fabric, better test it with a piece of scrap to avoid an expensive mistake.  :)

(vii) If you don't have a big enough piece,  the smaller pieces of interfacing can be joined and used as a big piece.  See link for instruction under the "More Tips" section.

(viii) Store them in a seal plastic bag.  I am guessing that this is becasue they attract dust easily...


For more details, here is a good link:
http://www.sewingsupport.com/how-to-apply-fusible-interfacing.html

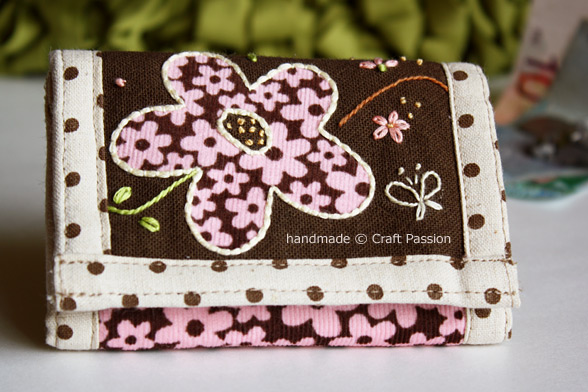
For making beg/purse/wallet:
1) Please refer to http://anic-lohas.blogspot.com/2010/07/wallet-project-part-2-looking-for-tips.html#tipforinterfacing for recommendation of cutting & ironing interfacing.
2) Interfacing Guide from Amy Butler
http://sewmamasew.com/blog2/?p=154


I have done this research on request of Meena (Zara).  I hope this meet her needs.  I thank her for making this request, gave me an opportunity to clarify quite a few doubts I have about interfacing.

Thanks to the owners of the above links for sharing this useful information.

Happy experimenting with your interfacing materials...

Saturday, July 24, 2010

Sewing Notions 1 - Zip

The meaning of sewing notions, excerpt from : http://en.wikipedia.org/wiki/Notions_%28sewing%29
"In sewing and haberdashery, notions is the collective term for a variety of small objects or accessories. Notions can include items that are sewn or otherwise attached to a finished article, such as buttons, snaps, and collar stays, but the term also includes small tools used in sewing, such as thread, pins, marking pens, and seam rippers. The noun is almost always used in the plural.[1] The term is chiefly found in the United States, and was formerly used in the construction Yankee notions"

I bought a few zips so that when I need one I have one.  The few buying experinces I have, here is what I found:


A) Zips without pull, you buy the length you like but you need to buy zipper pull as well.
It is about RM2 per meter for white colour and RM2.5 for black.  You have a choice of a bigger teeth or a smaller one.  I have only bought the bigger one as my zipper pulls fit well.  For tips how to thread the zipper pull, please see http://anic-lohas.blogspot.com/2010/07/wallet-project-part-2-looking-for-tips.html.

B)  & D) are the same, the normal zip with plastic pull.  I got B from "my Mydin" and it is only RM1.50 for 12x8" zips, RM0.125 for one..   Overjoy.. but I wonder if the quality is the same as D which I paid maybe RM0.50 (can't remember).  I examined closely, can't see any differences.
12 of B is 2.4 meter at RM1.50,  even if you buy and cut them to shorter zip, still good value for money.  em... should I stock more since cost of goods keep going up?

C) & E), the shop people call them the Man's zip,  small plastic teeth with metal zipper pull.  C is 7" and I paid RM0.80 for it.

F), they said this is the jean's zip, metal teeth and metall zipper pull.  Forgot the price, will update when I have it.

Now that I know zipper pull cost money, I will make sure I rip them off from faulty zips to reuse them.. :)  

Side note:  Is zip the same as zipper? Zip is UK English and Zipper US English.  Not that I am so good in English, I have to look it up...  I used zipper pull because it sounds better than zip pull..  :)

Wallet Project - Part 2 (Looking for Tips & Tricks)


1) Rethread a zipper pull
I saw some nice zipper pulls in Anna Patchwork and bought a pack of 4 (RM2.00) and was hoping one of the zips I have at home will work with them..   hehehe..  it fits very nicely with the metal zip (actually only the pull is metal, but that is how the shop people call it).
Here are the tutorials on how to do it:  
1) http://glass-beach.blogspot.com/2007/09/tutorial-how-to-re-thread-zipper-pull.html  
2)  http://handcrafts.blog.sohu.com/160225381.html

2) Hemming & corners
I have another cornering issue ( :) ), how to mitre the corners when I hem, and finally I found this useful tutorial!


 http://glass-beach.blogspot.com/2009/05/tutorial-hemming-cloth-napkins.html


3) Attaching Magnetic Snaps
I fear that the area where the snap is attached to, is easily torn....  so, have been researching and found these solutions:

(i) Use Interfacing to strengthen the snap area :
http://www.ehow.com/how_6054869_attach-purse-magnets.html

(ii) Use plastic canvas to strengthen the area
http://www.helloknitty.com

But where to buy this?   
I have seen suggestion of using transparent plastic sheet used in A4 book binding, I will look around at home to find something similar.
Updated 31 July:  should bend the prongs inward like (iii) so that they don't tear the fabric if you are not using a plastic canvas.


(iii) Use canvas,  felt or fabric scraps (double layer though)
http://www.warehousefabricsinc.com/blog/how-to-insert-a-magnetic-snap-into-a-bag/


4) Cutting and ironing Fusible interfacing
Craftpassion shared this tip:
http://www.craftpassion.com/2010/07/sewing-trifold-floral-wallet-tutorial-pattern.html


To read this tip, you need to know what are warp and weft.  I don't know what they are and have to look them up:

Excerpt from wikipedia:
"The warp threads run lengthways on the piece of cloth, and the weft runs across from side to side, across the bolt of cloth."

In short, the warp & weft of your fabric & interfacing should be cut & place so that they are opposite like the right image, this help maintain the shape of the wallet.


5) Attaching Bias Tape
I have been wondering when we attach bias tape, what do we do at the corners.
deng... deng...
(i) http://sewtospeak.blogspot.com/2010/04/how-to-attach-bias-tape-with-mitered.html
(ii)  http://esewingworkshop.com/forum/bias-tape#comment-179


6) Making Bias Tape

http://www.savvyseams.com/techniques/biastape.php
This does not use a bias tape maker... Just fold the strip into half iron, and then half again for the left, iron, and do the same for the right...


I was looking at bias tape makers and they are not cheap..  about RM30 - RM40 each and you need different makers for different sizes.
I was hoping I could DIY myself and found this nice idea! DIY bias tape maker from a long needle, very creative.

http://creativelittledaisy.typepad.com/creative_little_daisy/2007/11/diy-version-of.html

But if you make bias tapes so often, probably good to invest one.  In case you wonder how it works..:) like me, check this out:
http://www.patemeadows.com/Using-Bias-Tape-Makers_ep_62.html


7) Making internal zipper pocket
(i)  http://www.craftpassion.com


(ii) http://myleisurecraft.blogspot.com   (in mandarin but a picture says a thousand words.. :) )


(iii)  http://elily00.wordpress.com/tutorials/wallet/
-- I like the idea of sewing the 4 sides before turning the fabric... easier to manage.


8) How to sew nice even seam allowances or top stitching


http://nicolemdesign.blogspot.com/2008/08/how-to-sew-with-nice-even-seam.html


9) Top Stitching Tips
http://keyka.typepad.com/my_weblog/2009/10/top-stitching-tips.html
(Thanks to Mila for sharing this.)

10) How to make smooth curves and sharp corners

http://www.makeit-loveit.com/2010/08/sewing-tips-clipping-corners-and-curves.html

My search continues... will be updating this page while I find the tips & tricks.. Stay tuned..

Dear Crafters of the above links,
Thank you very much for sharing these useful tutorials,  let me know if you don't want to be linked..  Sorry that I didn't first ask for permission...

Friday, July 23, 2010

Wallet Project - Part 1 (Looking for Tutorials)

I have been thinking to make wallet and have looked around for tutorials and found these useful links: 

1)  http://verypurpleperson.com/2009/10/wallet-tutorial.html
finished size when folded: 21x10 cm  (8.5"x4")
finished size when opened: 21x20 cm (8.5"x8")
2 full width pockets
1 zippered pocket
6 card slots
(Azaidris used light weigth interface for card slots and medium weigth for wallet body and it worked well.)


2) Trifold Floral Wallet  - http://www.craftpassion.com/2010/07/sewing-trifold-floral-wallet-tutorial-pattern.html

This has a section on "Tips on cutting and ironing fusible interfacing".  Suggest you read before making any wallet.  :)


3) http://elily00.wordpress.com/tutorials/wallet/ 
With instruction on how to sew zip.   It used turn & top stitch technique.


4) Quilted Wallet - http://darnkat.wordpress.com/quilted-fabric-wallet-tutorial/

Looks like it is about the same size as 1) but without zippered pocket, 6 card slots, 4 half width pockets and 2 full width pockets.

(Azaidris used heavy cotton so she didn't use batting and it turned out great.)

5) Supercool Wallet - http://www.craftbits.com/project/super-cool-wallet


6) http://bluebirdswing.blogspot.com/2010/06/my-very-first-tutorial-lets-make-wallet.html

Similar size as 1) but tri-fold.  1 zippered pocket and similar card holders as 3).
7) http://noodleheads.blogspot.com/2009/10/zippy-wallet-tutorial.html

Zip closure with external pocket.   I have looked a few times, didn't find card pockets.


8) http://nadscraft.blogspot.com/2010/05/tutorial-tri-fold-wallet.html
 (thanks to nojie#craft for reminding me of this post, her experience is to use the thinnest interfacing.)


9) http://sewchristine.blogspot.com/2008/03/walletpurse-with-coin-compartment.html


10) Mandarin tutorial here:  http://www.pinbu.com/?uid-276569-action-viewspace-itemid-110269  with additional notes in English here:  http://anic-lohas.blogspot.com/2011/07/sew-along-patchwork-wallet-week-2.html


Many more links here but I haven't looked carefully yet:
http://www.craftster.org/forum/index.php?board=349.0

Dear Crafters of the above links,
Thank you very much for sharing these useful tutorials,  let me know if you don't want to be linked..  Sorry that I didn't first ask for permission...

Wednesday, July 21, 2010

Alternative to Cloth Pad - Menstrual Cup


Another reusable menstrual product..  Menstrual cup 

If you haven't heard, here is a good place to start:  http://en.wikipedia.org/wiki/Menstrual_cup

Now after you have figured what it is and are open to the idea, here is more information:

1) What size or brand should I get?
http://community.livejournal.com/menstrual_cups/1285963.html  

After reading, still do not khow what is best for you?

I just found this.."Take the Cup Quiz Here!

Is it better?  Or even more confusing...  :)

Luckily (or unlucky?)  I didn't know all this;  I was over excited and bought the cup from the only place I could find locally, TinyTapir.  I just bought one of the brands they carry, fortunately it works well for me

2) Where to buy?
TinyTapir carry Mooncup and Ladycup.   

Many brands sell their cups online too.   Here is a very good link that gives the list of websites for online purchase:
http://menstrualcups.friendhood.net/where-to-buy-f42/places-to-purchase-menstrual-cups-t38.htm#45

My favourite site for buying Ladycup is:
http://stores.ebay.com/LadyCup-menstrual-cups  as the seller includes shipping and sometimes you get good price via Auction. 

3) If you need more information, these are good places to seek help:
http://community.livejournal.com/menstrual_cups
http://menstrualcups.friendhood.net/forum.htm

I am not a Tampon user and don't like it actually.  But the thought of just having my cup with me that is all I need for my menses, I just can't resist the idea. Though the cloth pads are also good… but with cup, a lot less washing.   So, I was determined to get the cup work for me. This effort put in will bring a lot of convenience for the many years to come.   Fortunately, it turned out well for me.  :)

If you continue to read till this point, maybe there is a chance that you may try the cup..  :)
Let me know if you need more information, I will try my best to help..

Cloth Pad - No time to sew, where to buy?


If you have no time to sew your own cloth pads, here is a list of suppliers I have collected so far... 


Local cloth pads makers:
1) Saffa Cloth Pads - http://mum7kids.blogspot.com/
2) Mama Patch Cloth Pads - http://www.facebook.com/mamapatch
3) Blucotton Cloth Pads -http://www.facebook.com/blucotton
4) Ummi's Cloth Menstrual Pads - http://www.facebook.com/pages/UMMI-PAD/154120914624903
5) Babyz N Mom -  http://babyznmom.com/categories/Cloth-Menstrual-Pads-%26-Panty-Liners/
6)  Baby Snowdrop-  http://www.facebook.com/baby.snowdrop
7) Sweet Pretty Stuff - http://sweetprettystuff.blogspot.com/search/label/Cloth%20Pad

9) Niceclothdiaper - http://www.niceclothdiaper.com/
10)NatureCare Health Management - 48A, Jln SS2/4A, 47300 PJ, Tel: +603-7877-5614
Fax: +603-7877-5613/7710-8630   Email: admin@nature-care.org  (RM 22 pp for cloth pads made from organic material)


Local websites selling overseas product:

1) Fresh Moon, Hag Rag, Sckoon, Cyclez, Moonbow Cloth Pads
http://www.tinytapir.com/category/Cloth-Pads/c80

2) Blue Jayz & Fresh Moon Cloth Pads
http://mycheekyboo.com/categories/Cloth-Mama/

3) Moonbow Cloth Pads
http://mymall.netbuilder.com.my/index.php?doit=showclass&cid=86&domain=pattybelle

4) Momiji Cloth Pads
http://www.syadreamzsew.blogspot.com/
http://sweetprettystuff.blogspot.com/

5) Lunapads
http://www.miabambina.com/


ETSY is also a good place to find crafters' made cloth pads:
http://www.etsy.com/search_results.php?search_query=menstrual+pads+cloth&search_type=handmade&ref=auto

Sometimes some of them provide free shipping...   so, price is not too bad if shipping is free or not too high.

This one is interesting:
http://amysragbag.com - Starter pack USD15 plus USD4.5 for postage.

She has the pads made in a very flexible way and they could be used in different combination to meet the different type of flows.

Hope this help ladies who don't have time to sew but would like to try cloth pads...

Tuesday, July 20, 2010

DIY Cloth Pad - Part 6 (Where do you get the material?)

After you get excited about sewing your own cloth pads, where do you find the material? :) a very big smile on my face if you are trying out cloth pads.. :)   With cloth pads, the few special days of the month will hopefully become more fun, less pain and a lot more comfortable.. 


So, where do you find the material to make your own cloth pads?

Actually any cotton material at home, T-Shirt, Towel all good material to use. How do you know what you have is cotton? Use this test.


If you need the water proof security, then old umbrella, nylon sport pants, etc..

Look around your house and see what you could find.. :)  Lots of ideas of reusing what is available at home:
http://www.craftster.org/forum/index.php?topic=18462.0

However, if you prefer buying new material, then here is the list:
1) Flannel - you can made the entire pad from Flannel.
This is available from Kamdar & Nagoya. If you are like me, don't know what is flannel, here are some samples: flannel-plain, flannel-printed.

In Nagoya and Kamdar, it is about RM4 to RM5 per meter. The quality maybe different from those available online.  I have only tried flannel from Nagoya and a small fabric shop near my place.

To add absorbency, I add Terry (just towel.. :))

2) Other suitable fabrics
(i) Cotton -  Many cloth pad makers use this as top layer.  The red & blue pads in the above picture has cotton top. 
(ii) Sweet Pretty Stuff - http://sweetprettystuff.blogspot.com/search/label/Fabric - Bamboo fleece & Velour
(iii) http://www.bamboolite.com/organic-bamboo-fleece.htm  - Bamboo fleece
(iv)TinyTapir carry many types of bamboo fabrics, if you can afford them, they are very good material for cloth pads.
(v) Nisa Abas - http://madewithpassion.dsaiko.com/?p=962 - carry bamboo fleece, mocrofleece & hemp fleece
(vi) Lampinkain -  http://lampinkain.com/shop/diy-notions-supplies-c-14 - carry Seudocloth, good for the top layer close to skin.


2) Water proofing layer (not a must) - PUL (not the only way)
Here are local  places to buy PUL:
(i) http://sweetprettystuff.blogspot.com/search/label/Fabric
(ii) Hartini 
(iii) http://www.niceclothdiaper.com/diaper-fabric/diaper-fabric.php
(iv) http://lampinkain.com/shop/diy-notions-supplies-c-14 1 cut size of 18“x 20” - RM18
(v) http://madewithpassion.dsaiko.com/?p=962 - 1 meter RM68, it said Sandwich PUL
(vi) http://mum7kids.blogspot.fi/search/label/PUL%20FABRIC


There are plenty of overseas online suppliers, here is one recommended by quite a few cloth pad makers in ETSY : http://www.wazoodle.com
- 1 yard USD8.8, shipping USD10.7 (with surface mail, 1 yard is about RM65), however it will take about 30-45 days.
- they now have sale.... USD4.99 per yard

But is water proofing a must?  I suggest you try out without it and use the pad at home to see whether it leaks and make necessary adjustment.


Other water proofing material:
1) Many cloth pad makers use fleece as resistant layer.

2) White rubbery sheet which is used as external layer for transitional cloth nappy.  This could be found at nappy section in the supermarket.  However, it is a bit hard to sew as it is very delicate material. Suggest zigzag stitch to prevent creases.  (Info provided by Lynn)

3) Fastenings
Please see my other diy-cloth-pad-part-2.

Anything I miss?  Can't think of anything now..

If you need instructions, please see diy-cloth-pad-part-3.

Happy sewing...

Sunday, July 18, 2010

DIY Baju Kurung - Part 1

I bought a Brother sewing machine from LSN and they gave free baju kurung classes...  Can't waste it and good to build up sewing skill. 

So I went for 2 classes and with the notes from http://naninana.tripod.com/, I managed to get the baju kurung till this stage:

Quite happy with the result.  Still need to figure out how to do the balut.   Probably have to go back to class...

Plant-It-Yourself Taugeh - Part 2

Another round of home sprouted Taugeh...  no more stock at home.. :)


These are from organic green beans...  I really love taugeh sprouted in my own kitchen..   They are tasty and very easy to do…   You may think that it is so cheap to buy Taugeh…  the organic ones are not cheap though,  I saw that it was RM3.5 for a small packet when I was at an organic shop the other day.

If you haven’t tried, give it a try…  There is a sense of achievement seeing the green beans turning into Taugeh..  ..  :)

For instruction, please refer to previous post.

Friday, July 16, 2010

DIY Cloth Pad - Part 5 (Insert Pad)

Another insert design cloth pad...  In case you wonder why I tried so many designs...  :)  I was trying to find a design which is easy to sew, lower cost, easy to dry and allow users to reuse material at home such as Towel, T-Shirt, etc.

The left most is the pocket without water proof, middle is the insert which is to be folded into 3 and the right most is the PUL booster.

Instead of sewing the inserts, wash cloths or towel handkerchiefs can be used as inserts..  :) I thought this should be good for ladies without a sewing machine at home.

With PUL Booster inserted between the pad and panty if required...   The same PUL booster can be used with other non water proof cloth pads.


Too many cloth pad posts?  Maybe I should start posting about my other interest, soap making...  :)

New to cloth pads?  Please see my other cloth pads post.

Link Within

Related Posts with Thumbnails