Pages

Ladies, if you haven't heard about environmental friendly reusable menstrual products, please read posts on Cloth pads & cups...
Showing posts with label Sewing Technique. Show all posts

Monday, October 1, 2012

Bag Project 19 - Sewing Notions Box

My 10th project with Alice Peng's sew along...   Another one with cord piping.    Wanted the box to stand well, I used very hard stabiliser...   so difficult to sew at the corner.   Not so much about the ability of the sewing machine sewing thick material, but more of ensuring edges of all layers line up exactly...


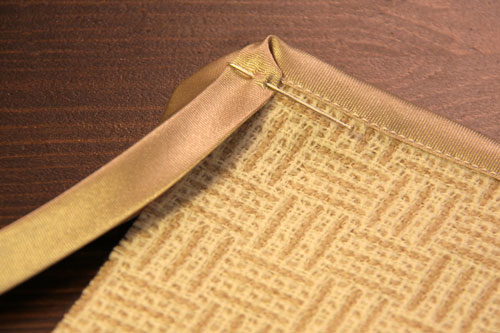
A few photos which hopefully explain the technique I was taught on how to do cord piping which cover a full square/rectangular/circle:


 First, find out the length of bias tape

 Remove the clip and sew the 2 ends together...   See step 5 here : http://www.sewlover.com/basic/binding/01.html


Now, we have the right length of bias tape with 2 ends sewn.


  Baste it..  and then put the cord in the middle and fold the bias tape into half..


Baste it again but make sure you leave a few centimeters not basted at the 2 ends of the cord

Hand sew the 2 ends of the cord together....

Baste the 2 ends....

I hope the above pictures are useful to you....  

When sewing the pieces together, it is very important that edges of all pieces line up correctly.

Useful reference links for adding piping to bag:
1) http://www.sew-it-love-it.com/sewing-cording.html
2) http://tw.myblog.yahoo.com/jw!xIaEdO2eGRxklvw1H5zeF_4S/article?mid=57805  - this one shows how to join the 2 ends without overlapping..   I don't have the fanciful double sided tape,  I just use pin or clips... 
3) http://punkinpattern.blogspot.com/2011/07/how-to-sew-in-piping.html


Update:  Mila, I use adjustable zipper foot, either one of below.   You could also use the normal zipper foot.


Bye,
Anic

Tuesday, November 23, 2010

Bag Project 4 - Hexagon Patchwork Bag (Completed)

Finally...  I have completed the hexagon patchwork bag.   :)  I don't think I will start another project like this anytime soon. Taking too much time...   :)  

Previous posts about this project here & here.


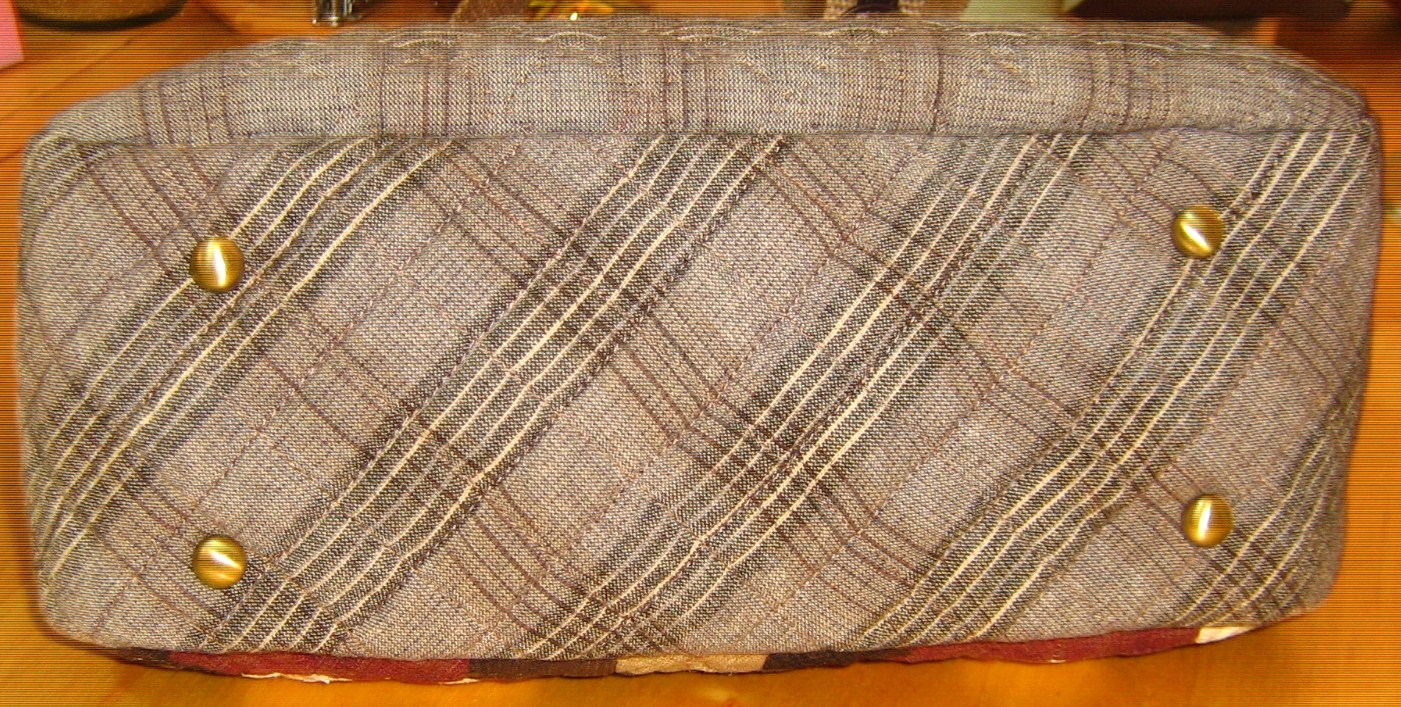
I have inserted purse feet for the bag, see this useful link to learn how:


The look of inside (inside out before turning).   The "Boxy Bag" tutorial has provided great help in attaching the lining.


Made quite a few mistakes along the way...   My thread unpicking technique has improved.. :)   See below to learn a few tricks:


Material used:
1) Fabrics
This is a project I bought from  Emma's handmade.  The outer fabric came with the project however I didn't used the lining fabric provided as it is blue.  I didn't think that it will go well with the outer fabric, hence I used  Japanese fabric "Alice's In The Wonderland" from stock clearance corner of May May Shop instead.

2) PU leather handle, rivet and purse feet
These are bought online from China website.
Rivet is also available from My handmade Station


I found these useful links which help in bag making :

1)  Attaching leather handle (The one above is PU and not real leather. I prefer not to use leather...)
http://u-handbag.typepad.com/uhandblog/2010/06/how-to-attach-leather-straps-to-your-handmade-bags.html?utm_source=feedburner&utm_medium=feed&utm_campaign=Feed:+U-handblog+(U-handblog)

2) How to set a double cap rivet?
http://www.howtohistory.com/2010/06/how-to-set-a-double-cap-or-jiffy-rivet/

3) How to sew curved corner?
http://u-handbag.typepad.com/uhandblog/2007/04/one_of_the_medi.html?utm_source=feedburner&utm_medium=feed&utm_campaign=Feed:+U-handblog+(U-handblog)

5) How to press purse & bag?
http://nicolemdesign.blogspot.com/2008/10/pressing-matter.html
I used thick canvas bought from Nagoya (1 meter about RM10.50).  In the old days,  my mom used this too for ironing and I was happy to see it at Nagoya.  :)

6) Sewing the zipper pocket
http://elily00.wordpress.com/tutorials/wallet/

Bye now,
Anic

Tuesday, October 26, 2010

Bag Project 4 - Hexagon Patchwork Bag (1)

I have been working on this project for a couple weeks now...    Hexagon patchwork bag...   so much work..   Sewing a little at a time..  sikit sikit lama lama jadi bukit.. :)


The back
 Here are useful tutorial links for hexagon patchwork:
1) http://www.youtube.com/watch?v=FVkV8JBNaIQ
2) http://www.craftstylish.com/item/8335/how-to-english-paper-piecing-project


 The notions I used:

There are 6 needles in this pack.  The thread on the left is Fujix Pice.
I used applique needle by Clover (bought at Craftworld at SS2*) & Fujix Pice thread for piecing.   The needle is quite fine.  I need my thimble to use this needle as even the back of the needle is quite sharp.
The thread is fine and strong specially design for patchwork or applique.   Got it from Nana Craft Corner.   I only bought 1, to me it is quite costly.  :)
I chose a colour which I think should go well with most colours (or I dream it will be that way.. :) )

Note *:  If you buy > RM100 in Craftworld, you could become their member and the next time you buy things from them, you get 10% discount (not on all items).  

Bye now..
Anic
Saturday, October 16, 2010

Envelope Card Holder

I saw this simple envelope card holder in one of the craft forums.   I made one for my blood donation record book (about the size of a credit card):


BTW, there are a lot of advantages donating blood, it actually improves health...  


... Blood donation is an excellent way to get rid of excess iron accumulated in our body due to its overconsumption.  Excess iron in the body can stimulate the formation of free radicals, which are responsible for causing damage to body cells and tissues. Free radicals are also associated with many diseases like heart diseases and cancer. ........ Studies have shown that donating blood regularly can be beneficial for the heart and circulatory system and can reduce the risk of heart diseases, especially among young people.... Besides, blood donation also burns the extra calories and reduces your cholesterol level...  

In addition, you get free medical service from the government if you are donating to Pusat Darah Negara or Government operated medical facilities.   Of course you don't need this if you are already getting free service.  :)

For example:
1 kali ---- Percuma rawatan pesakit luar dan rawatan perubatan (tidak termasuk bayaran X-ray dan pembedahan) dan wad kelas dua untuk tempoh 4 bulan.

2 kali (dalan tempoh 12 bulan)   ---- Percuma suntikan pencegahan Hepatitis B

2 ~ 5 kali  ---- Percuma  rawatan pesakit luar dan rawatan perubatan dan wad kelas dua untuk tempoh 4 bulan.

See more details here:


This card holder is quite simple to make.   Here is the dimension without seam allowance.   


I cut a piece of kain keras as above size.  Then I cut 2 pieces of fabric with same shape but with seam allowance.   I then used iron-on fabric double sided tape to fold the seam nicely for the cover fabric, sewed the printed tapes, then fold the seam for the lining and sticked it to the other side of kain keras again using double sided tape.  :)

Sewed the short straight end and then folded it into envelope shape and sewed the two sides and the triangle side...  then it is done..  :)   No turning and trying to pull fabric & kain keras through a small opening.   

Here is a modified version for my cloth pad: 


Where could you get the iron on double sided tape?  It is especially helpful for sewing a zip.  Stick the zip onto the fabric with this and I could then sew it happily without having to worry about the placement of the zip.  :)


1) Love and Craft Supply - http://loveandcraftsupply.blogspot.com/2010/10/infusible-lining.html
2) May May Shop - http://maymayshop.blogspot.com/2010/09/rmat-22-fabric-iron-on-double-side-tape.html
3) Nana Craft Centre - http://hong2lee.blogspot.com/search/label/Fabric%20Double%20Sided%20Tape
or
4) Emma - Fabric Glue stick (this will fix the fabric temporary and could be washed away, save the hassle of using pin)
http://emma37handmade.blogspot.com/2010/10/blog-post.html


Let me know if you need more photos on the steps to do these.

Have a good weekend,
Anic

Sunday, October 3, 2010

Bag Project 3 - Linen Cotton & Green Polka Bag

Newly made bag for my mom, hope she likes it...


The pattern is taken from this book I bought from Applemama.  I don't have an exact pattern and tutorial link to share for this one, however the design is almost like the one below except that the it does not use a zip:
http://www.craftster.org/forum/index.php?topic=32204.msg9268#msg9268

Materials used:
1) The linen cotton:
I bought it when she had promotion.   Otherwise, it would be costly as it is imported Japanese Linen Cotton by Lecien Corp.

2) Green polka from May May.

3) Green stripe from Nana Craft Corner - again..  got it when she was giving 20% discount.  :)

4) 8" YKK Zip from Heart Handy

Finally, I am able to sew an even seam... hooray..  :)   See the below picture, there are 3 lines on the pressure foot.  For sewing a 0.7 cm seam, I align the edge of the fabric on the 3rd line. 


It is probably easier if I buy the Seam Guide:
http://www.acesewvac.com/bro-seam-guide.html

Checking out how much it cost...

Bye now,
Anic

Saturday, September 25, 2010

Sewing Notions 12 - Bobbins

My brother machine NV50 came with 3 bobbins.   This is of course inconvenient as we are likely to use more than  3 colours of threads.  However, being cost conscious, I didn't buy more bobbins from the original seller of the machine thinking that I could buy them from other places at cheaper price.   I ended buying 3 wrong types of bobbins.  :(   Looks like I am penny wise and pound foolish...

I was annoyed by this, so I did some research on this:
1) Found a list of different type of bobbins in the following link..   didn't realise there are so many different types:

Brother NV 50 uses SA156 (Class 15 plastic).  Does anyone know if NV50 uses the metal version of class 15 ok?

Even for Brother's machines, there are different types of Bobbins:

2)  Here is a good guide on how to thread the bobbin correctly for top loading:

(A picture of thread not inserted correctly through tension adjusting spring)

While looking, I found this useful Brother website with Manuals & troubleshooting information.   Though I have the hardcopy of the manual, it is easier sometime referring it online:

Recording my findings for my own convenience and sharing them with you....

Tuesday, August 24, 2010

Kitty Applique Coin Purse Project - Part 2 (Quilting Technique)


Finally I completed this kitty coin purse.  It was almost fully hand sewn except the seam which I sewn it with machine.  Regretted! :(   I looked at some other similar material craft work and the seam without stitch line shown is nicer..

My first piece of quilting craft.  As expected, work of beginner without quilting technique.  The thread was not pull tight enough and stitches length not even and too big.   Never mind.
 
Below are links I found useful but I read them too late:

1) http://sentimentalstitches.net/instructions/hand-quilting/
A good overview on hand quilting

2) http://annamariahorner.blogspot.com/2010/03/stitch.html
I learnt how to hide the knot from here.   Basically make a knot and then gently tug it through the first layer of fabric.

3) http://www.threadsmagazine.com/item/3734/perfect-your-hand-quilting-stitch
Haven't figured out if the technique shown could be used when a hoop is not used.  


I am now doing a blanket stitch to the side of the zip to make it neater....


Thanks to the above link owners for sharing their knowledge...

Previous post about this project:
http://anic-lohas.blogspot.com/2010/08/kitty-applique-coin-purse-project.html

Saturday, August 21, 2010

Kitty Applique Coin Purse Project - Part 1 (Applique Technique)


A very good morning...

I have been doing this small project for a few days now, a little at a time, during my way to office, in the late evening after work... finally this morning, I finished the last bit of the kitties.

I wanted to learn applique quilting, even though I have not even done quilting before.  So, I bought this kitty applique coin purse kit online as I thought it will give me all the instructions I need.   My expectation was wrong.  It was not really for beginner like me who has never done one before.   Luckily the stitch names are there in the brief instructions provided, so I could ask my good friend, Mr Google what they are :).   I went searching and found tutorials for the stitches I need:

1) Needle Turn Applique Stitch - To sew the applique to the background without showing the stitch
http://appliquetoday.blogspot.com/2008/04/needleturn-applique-stitching-tutorial.html 

There is an easier way of doing this if the applique is large.  Sew the outline with wide stitch and then pull the thread so that the seam gathered underneath and sew it the same way as above.  I have only read the instructions but haven't tried it:
http://www.sewlover.com/basic/applique_technique.html

Another tutorial: http://www.360doc.com/content/10/0929/09/69678_57231974.shtml

2) Fly Stitch for the nose & mouth

http://inaminuteago.com/stitchdict/stitch/fly.html

3) Outline Stitch - for the leg & moustache
http://stitchschool.blogspot.com/2009/12/stitch-school-stem-and-outline-stitch.html

Here is a handy stitch dictionary I found:
http://inaminuteago.com/stitchindex.html

Thanks to the link owners for sharing the information, otherwise I won't be able to complete the kitties. 

Bye now and have a wonderful weekend.http://www.360doc.com/content/10/0929/09/69678_57231974.shtml

Monday, July 26, 2010

Sewing Notions 3 - Interfacing (Focusing on Bag)

I searched on the internet a bit more on the topic of interfacing for bags/wallets,  found a good site related to bag making, by Lisa Lam at U-handbag:


1)  Interfacing & Interlining De-mystified
  http://u-handbag.typepad.com/uhandblog/2007/01/interfacinginte.html
 
Lisa explained which interfacing goes well with which fabric.  She also shared how to avoid bulk at the seam (the same as si kurus suggested) and why use a lighter fusible interfacing than the bag's fabric.  (It is so that any creases made due to normal bag use will not show up in the bag! this does not happen to sewn in interfacing though..)

Another very good link about interfacings in bag making:
http://nicolemdesign.blogspot.com/2010/08/combining-interfacings-for-bag-making.html

2) Choosing Fabrics & Interfacings
http://u-handbag.typepad.com/uhandblog/2009/01/bag-making-for-newbies-part-2---choosing-fabrics-interfacings.html


She provided suggestion of fabric and interfacing combo, here is an example, checked out her post for more combo suggestions:
Bag Type = Firm structure boxy handbag
Fabric = Quilt weight cotton
Interfacings = Medium Fusible on all bag parts and some stiff Ultra Firm Fusible on the exterior and Heavy Sew-in in between the exterior and the lining fabric, also there is a stiff grid bag bottom on the base.


There are many good posts on bag making for beginners:
1) If you wonder the meaning of the terms such as Right/wrong side out, Seam allowance etc used in the bag making instructions, see this:
http://u-handbag.typepad.com/uhandblog/2009/01/bag-making-for-newbies-part-1-sewing-terms.html

2) How to strengthen - reinforce - or beef up your handbags and purses

http://u-handbag.typepad.com/uhandblog/2007/04/ahhh_grasshoppe.html


3) Machine Needle know-how
http://u-handbag.typepad.com/uhandblog/2010/06/bag-making-for-newbies-part-3-machine-needle-knowhow.html


Many more good stuff, check out her blog...

Thanks to Lisa for sharing her experiences and knowledge...

Happy reading...

Sunday, July 25, 2010

Sewing Notions 2 - Interfacing (Basic Info & How to Apply)

I don't know if interfacing is considered as part of sewing notions.. but never mind, I like it this way so that my posts are organised nicely.


For newbie on the journey of sewing:

1) What is interfacing and the different types of interfacing?
Interfacing is either fusible or non-fusible and it is either woven, non-woven, or knit.
It is an extra layer of fabric that provides shape, support, stiffness and reinforcement.

Read more at:
http://www.fabriclandwest.com/Notion_basics/Interfacing/interfacing.htm#options


I figured the interfacing I normally bought from the shop here is called fusible non woven interfacing.  They are either light, medium or heavy weight. So far, I have only tried light (RM2.0 per meter) & medium weight (RM2.2 per meter).

It is called Kertas Gam but actually it is not made of Kertas! Before this morning, I thought it is really "kertas yang disapu dengan gam".  hehhe..  I even thought that the gum will dissolve in water so it should stay dry before use though I wonder what happen when we wash the cloths which use "Kertas Gam".   I was ignorant..

I soaked a small piece of the interfacing I have and it is still strong when it is wet and of course no gum came out.  :)


I have also bought non fusible non woven heavy weight interfacing before, used for collars.  I think this is "Kertas Keras", if I am wrong please let me know.   I have cut a strip for my yet to sew Balut (form part of the waistline of the long skirt of Baju Kurung).  This is also available in long strip at the shop sold by meter.  But to save cost,  I cut it from my big piece of Kertas Keras.

But then, these are only 2 types of interfacing material. If you read the above link, there are many types.

At the shop, you will see the different weight of interfacing rolls standing at one corner of the shop.

2) How do you choose which interfacing to use?
http://www.fabriclandwest.com/Notion_basics/Interfacing/interfacing.htm#choosing

As a general rule of thumb, choose one which is lighter than the fabric and with similar care requirement.   Beware that fusible interfacing is not for all fabrics.

Here is a nice chart that categorises the fabrics into weight categories and the type of interfacing to use:
http://www.fabriclandwest.com/Notion_basics/Interfacing/interfacing_chart.htm

3) How to apply fusible interfacing? 

In the past, I happily slide the iron on the interfacing directly..  erhh...  this morning I learnt that:

(i) Steam the interfacing first to preshrink it.  Assuming you have an iron with steam coming out :) , hold it over the interfacing not touching it for a few seconds.  If you don't have steam iron or you are very hardworking, then prewash, please see here: http://sewing.lifetips.com/tip/69341/fabric/interfacing/preshrink-fusible-interfacing.html.

(ii) Use a press cloth and spray water to dampen it evenly (not soaking wet).  Put the press cloth on top of the interfacing, use a little higher heat than what is required by the fabric.  Apply pressure for about 10 seconds for light weight and slightly longer for heavier weight.  Other than heat, one other key success factor is pressure.  So, if your ironing board is too high, this can be difficult and tiring, lower down your ironing board.  

(iii) DON'T slide, press and lift... aiyoh should have learnt this long ago, no wonder my piece of fabric that I ironed the interfacing on, become bigger as it was stretched and glued onto the interfacing..  :(

(iv) Baste the interfacing and fabric by touching it in several places with the tip of your iron.  This will bond the interfacing to your fabric lightly so that it won't shift.  BTW, the shining side is the side which will stick.

(v) Patience and don't lift your fabric piece before it is completely cooled, otherwise the bonding process maybe affected.

(vi) For an expensive piece of fabric, better test it with a piece of scrap to avoid an expensive mistake.  :)

(vii) If you don't have a big enough piece,  the smaller pieces of interfacing can be joined and used as a big piece.  See link for instruction under the "More Tips" section.

(viii) Store them in a seal plastic bag.  I am guessing that this is becasue they attract dust easily...


For more details, here is a good link:
http://www.sewingsupport.com/how-to-apply-fusible-interfacing.html

For making beg/purse/wallet:
1) Please refer to http://anic-lohas.blogspot.com/2010/07/wallet-project-part-2-looking-for-tips.html#tipforinterfacing for recommendation of cutting & ironing interfacing.
2) Interfacing Guide from Amy Butler
http://sewmamasew.com/blog2/?p=154


I have done this research on request of Meena (Zara).  I hope this meet her needs.  I thank her for making this request, gave me an opportunity to clarify quite a few doubts I have about interfacing.

Thanks to the owners of the above links for sharing this useful information.

Happy experimenting with your interfacing materials...

Saturday, July 24, 2010

Wallet Project - Part 2 (Looking for Tips & Tricks)


1) Rethread a zipper pull
I saw some nice zipper pulls in Anna Patchwork and bought a pack of 4 (RM2.00) and was hoping one of the zips I have at home will work with them..   hehehe..  it fits very nicely with the metal zip (actually only the pull is metal, but that is how the shop people call it).
Here are the tutorials on how to do it:  
1) http://glass-beach.blogspot.com/2007/09/tutorial-how-to-re-thread-zipper-pull.html  
2)  http://handcrafts.blog.sohu.com/160225381.html

2) Hemming & corners
I have another cornering issue ( :) ), how to mitre the corners when I hem, and finally I found this useful tutorial!


 http://glass-beach.blogspot.com/2009/05/tutorial-hemming-cloth-napkins.html


3) Attaching Magnetic Snaps
I fear that the area where the snap is attached to, is easily torn....  so, have been researching and found these solutions:

(i) Use Interfacing to strengthen the snap area :
http://www.ehow.com/how_6054869_attach-purse-magnets.html

(ii) Use plastic canvas to strengthen the area
http://www.helloknitty.com

But where to buy this?   
I have seen suggestion of using transparent plastic sheet used in A4 book binding, I will look around at home to find something similar.
Updated 31 July:  should bend the prongs inward like (iii) so that they don't tear the fabric if you are not using a plastic canvas.


(iii) Use canvas,  felt or fabric scraps (double layer though)
http://www.warehousefabricsinc.com/blog/how-to-insert-a-magnetic-snap-into-a-bag/


4) Cutting and ironing Fusible interfacing
Craftpassion shared this tip:
http://www.craftpassion.com/2010/07/sewing-trifold-floral-wallet-tutorial-pattern.html


To read this tip, you need to know what are warp and weft.  I don't know what they are and have to look them up:

Excerpt from wikipedia:
"The warp threads run lengthways on the piece of cloth, and the weft runs across from side to side, across the bolt of cloth."

In short, the warp & weft of your fabric & interfacing should be cut & place so that they are opposite like the right image, this help maintain the shape of the wallet.


5) Attaching Bias Tape
I have been wondering when we attach bias tape, what do we do at the corners.
deng... deng...
(i) http://sewtospeak.blogspot.com/2010/04/how-to-attach-bias-tape-with-mitered.html
(ii)  http://esewingworkshop.com/forum/bias-tape#comment-179


6) Making Bias Tape

http://www.savvyseams.com/techniques/biastape.php
This does not use a bias tape maker... Just fold the strip into half iron, and then half again for the left, iron, and do the same for the right...


I was looking at bias tape makers and they are not cheap..  about RM30 - RM40 each and you need different makers for different sizes.
I was hoping I could DIY myself and found this nice idea! DIY bias tape maker from a long needle, very creative.

http://creativelittledaisy.typepad.com/creative_little_daisy/2007/11/diy-version-of.html

But if you make bias tapes so often, probably good to invest one.  In case you wonder how it works..:) like me, check this out:
http://www.patemeadows.com/Using-Bias-Tape-Makers_ep_62.html


7) Making internal zipper pocket
(i)  http://www.craftpassion.com


(ii) http://myleisurecraft.blogspot.com   (in mandarin but a picture says a thousand words.. :) )


(iii)  http://elily00.wordpress.com/tutorials/wallet/
-- I like the idea of sewing the 4 sides before turning the fabric... easier to manage.


8) How to sew nice even seam allowances or top stitching


http://nicolemdesign.blogspot.com/2008/08/how-to-sew-with-nice-even-seam.html


9) Top Stitching Tips
http://keyka.typepad.com/my_weblog/2009/10/top-stitching-tips.html
(Thanks to Mila for sharing this.)

10) How to make smooth curves and sharp corners

http://www.makeit-loveit.com/2010/08/sewing-tips-clipping-corners-and-curves.html

My search continues... will be updating this page while I find the tips & tricks.. Stay tuned..

Dear Crafters of the above links,
Thank you very much for sharing these useful tutorials,  let me know if you don't want to be linked..  Sorry that I didn't first ask for permission...

Link Within

Related Posts with Thumbnails