Pages

Ladies, if you haven't heard about environmental friendly reusable menstrual products, please read posts on Cloth pads & cups...
Showing posts with label Applique. Show all posts

Saturday, August 31, 2013

Applique with Shinnie - 2012

I did these applique work with Shinnie sew along in 2012...


March 20 12 -  Long Wallet


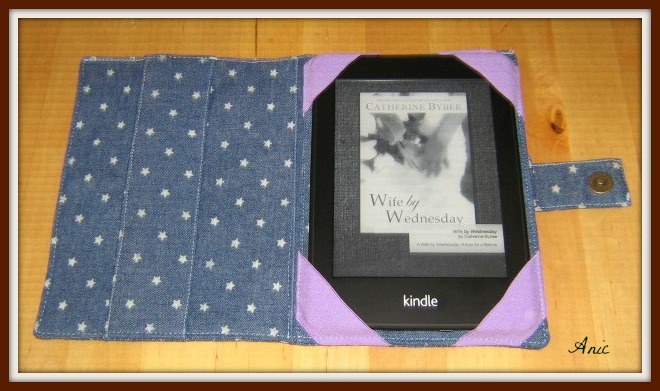
April 2012 - Phone Case..


May 2012 - Wallet


Sept 2012 - Passport holder


They were originally posted in my yahoo blog (yes.. I have one) but we were just informed that yahoo is closing its blog service..   so, moving them here...

If you like some hints on doing applique work, please see my old post here:
http://anic-lohas.blogspot.com/2010/08/kitty-applique-coin-purse-project.html

Happy Merdeka Day,
Anic

Friday, February 15, 2013

Kindle Cover DIY

My second project for 2013...     A Kindle Cover..   Actually the main focus is the applique work on the front, assignment with Alice Peng sew along group.


The Kindle cover is based on the below tutorial:

I used Fold Over Elastic (FOE) for the 4 corners holding the Kindle and batting rather than inserting cardboard into the cover.  If I were to make it again, I will measure 2.5 inches from the edges for the FOE.  Currently, if I hold it at the bottom right corner, the Kindle will come out from that corner.

Useful tutorial on sewing applique curves:

If you want to make one yourself, here is more ideas:
http://pinterest.com/aniclohas/laptop-kindle-covers-sleeves/

Updated: 17 Feb
I made another one..   This one hold the Kindle well..  :)


Regards,
Anic

Saturday, April 7, 2012

Shinnie Sew Along - Project 1 (Applique Long Wallet)

I joined a sew-along organised by Shinnie focus on applique.   She has published a lot of her work in craft magazines and also her own books.    There will be six assignments in this sew along (all with Shinnie unique applique design)  and more than a thousand crafters have joined this sew along.

The first assignment is a wallet, see the below cute design by Shinnie.


Here is my version.   Plenty room for improvement.


Great difficulty in attaching the zipper.   Have to find a better way of doing this.   

For applique & stitches how-to, please refer to my kitty applique coin purse project.

Please meet my new friend, needle threader....

I have to invest in this as the most fearful thing for me while I do applique is having to thread the applique needle..     The hole in the applique needle is really really small.

Other than the above, my other friends in applique work:


I have reported this before in my other post.


Have a great weekend,
Anic


Sunday, May 8, 2011

Sew Along - MyBotang Appliqué Project..5

I completed the bag I wanted to make using the flowers applique I made recently (with MyBotang Sew Along,  A big Thank You to Sue for organising this.)

It is a simple bag and similar technique could be seen here:
http://anic-lohas.blogspot.com/2010/07/bags-from-old-t-shirts.html


I added batting to the applique and quilted a bit using Nylon invisible thread (sample of how it looks.  I bought it locally in Ampang, about RM7 per spool of 200M).  It is almost stress free sewing with invisible thread..  Since it is designed to be invisible, it is not easy to see even if the sewing is bad..  :)

This is the back of the bag..   I finally have a chance to use this blue & flower laces which I think I got them as free gift from fabric suppliers.  

The bag was made from an old pair of jeans.  I probably have it for more than 15 years.   I have only used the leg parts of the jeans.


 I kept the top part, planning to turn it into another bag...


The lining is made from an old denim shirt.  I left the pocket intact..  I needed a pocket inside the bag anyway..  :)


The blue cotton strap came from http://loveandcraftsupply.blogspot.com/ (already out of stock), 1 meter RM3.6.

oh..  please meet my new friend, Jean-A-Ma-Jig.  Without it, sewing through the thick Jeans seam would be a night mare...

See here on how to use Jean-A-Ma-Jig:

The above link has better pictures and explanation of how the tool is used.  But here are 2 lousy pictures I took.   To sew over thick area, the presser foot is at an angle, we could slide the Jean-A-Ma-Jig behind the presser foot (or in front) to make the presser foot even, then sewing is easier...


Bought it from Joann, tumpang kawan beli....

Have a good weekend,
Anic

Tuesday, May 3, 2011

Sew Along - MyBotang Appliqué Project..4

Finally...   I completed the sewing...   I didn't use a black colour thread for the flowers as I didn't think that it will go well with the dark background.    But the yellow thread I used didn't show very well with the light colours flowers..  I should have used a slightly darker colour for the white flowers.  Oh well, I used a thicker thread (the shop person said it is for sewing jeans) and I am only willing to buy 2-3 spools.  I bought yellow because I like the Sun Flower as it is and didn't want my potential bad sewing to ruin it.   :)

Now, I just need to turn it into a bag.   :)


Some notes:
1)  My machine was skipping stitches..   and finally figured that I need to change my needle. Replacing the needle solved the problem.

Read more here for potential reasons why the machine may skip stitches:
http://www.pfaffmachines.co.uk/faq/sewing-machine-missing-skipping-stitches/

Another useful post on what to do when machine is not stitching properly:
http://www.fabrics.net/sarahmachinerepair.asp

2) Thread
I was trying to learn more about thread and found these links useful:


a) Sewing with the right thread - gives an overview of different type of threads available:


b) This link has microscope view of various quality thread.    The low quality ones, the thread has lots of loose fibers:
http://sewing.about.com/library/weekly/aa102100a.htm

When I bought my sewing machine, the shop person said I should use good thread and they recommended Dolphin - buatan Malaysia (what they sold in the the shop).  I have never looked at what it is... until this morning..  lol.  The label said polyester and  "D" and a number  on the spool.  I guess the number is the colour number system of Dolphin.    What thread do you use?


Check out the various type of threads available on this site just for our knowledge.   Luckily I didn't know there are so many choices, otherwise, I would be so confused to start with so many..  :)
http://www.sewessential.co.uk/CategoryTree.asp?CategoryID=637

This one is interesting..  -  Water Soluble thread! http://www.sewessential.co.uk/Category.asp?CategoryID=1339&NumPerPage=5&page=1   It is for basting...  but if you use it accidentally to sew cloth...  the cloth will fall apart while you wash it..  :)

Bye now,
Anic

Saturday, April 16, 2011

Sew Along - MyBotang Appliqué Project..3

Previous post about this: 
1) Sew Along - MyBotang Appliqué Project..1
2) Sew Along - MyBotang Appliqué Project..2


Once start... difficult to stop...  Here is my vase with flowers waiting to be machine stitched...   :)


Some part was not cut well... feel like I need to get better scissors...  Any recommendations? :)

Trying to do something else now...  :)

Bye now...
Anic

Sew Along - MyBotang Appliqué Project..2

Previous post about this: http://anic-lohas.blogspot.com/2011/04/sew-along-mybotang-applique-project.html

I found other interesting links...   The previous links I found were using Satin Stitch but I think the concepts apply to straight stitch for going round corners, circle etc..

Here is a nice video tutorial using straight stitch with raw edge:
   Applique-Raw_Edge_Stitching__D51.html

------Oh... it looks so useful to have a walking foot..   I want one..  :)

Another useful video with the details of cutting fusible web and ironing:
   http://www.youtube.com/watch?v=k1OahzmtM50

Other nice video tutorials of machine applique with hiding edges for future projects :) :

   Machine_Applique-Straight_Stitch__D57.html
   Invisible_Machine_Applique_Stitch__D53.html


Some real work:
I have the pattern cut out already..   Just on normal paper...   aiyah... actually,  I could have traced the pattern directly on fusible web which is what we supposed to do...


I have the habit of cutting out patterns and then use that to trace on fabric... (for hand sewn applique).


Cut not exactly the way the pattern was printed... added my own taste.. :)

Presser foot which I may use...  if not just the normal foot:


The tutorial said we could use either very light or very dark background...   I am going to try a dark one, hope it turns out well.   I want to make a blue bag.


A side note, anyone interested with the below little iron?  I saw it in one of the above videos, looks useful.  :)
Emma has it on her blog:


Emma doesn't have it in stock but if there are 5 units, she could help purchase.  It is RM78 each.  This is unconfirmed information, if there is interest, I could check.

Bye now and have a good weekend,
Anic


Wednesday, April 13, 2011

Sew Along - MyBotang Appliqué Project..1

So long...  I didn't sew...   There are other things which have higher priority..   When I am not doing something, I don't usually say I don't have time..  as I know it well that it is due to lack of priority given..  i.e.  if I could give something the priority, there will be time..  :)

Anyway,  I need a good push to sew something,  I decided to join Sue's sew along.


A perfect opportunity to:
1) Try out machine applique - em.. don't have applique foot-lah...
2)  Use the Steam-a-seam-2 I bought looong time ago from SS2 Craft World, quite pricey... I like Mila's way.. use interfacing and glue.. :)
3) Clear some fabric scraps..
4) Sew another bag,  planning to turn the applique into a bag....

My research before I start the project:
1) How to use steam-a-seam-2 
I watched the 3rd video on this page.

2) Machine Applique techniques 
---  Don't have Applique foot then use what erh?  
Read more about why applique foot is good:  http://www.sewaquilt.com/walking-foot-vs-applique-or-darning-foot.html,

I am going to just try open toe foot or the the normal foot..  let's see how it goes.. :)  I think the presser foot shown in the picture of Sew, Mama, Sew page is an open toe foot.

---  Some tips on how to stitch applique:
See point 11 of  http://www.myhappycrazylife.com/how-to-applique/

--- Tips of sewing corners, circles, squares:  
http://www.stitchemup.com/applique/satin-stitch.htm


Though the page use a satin stitch but I think the concept applies to straight stitch...


Good tips from the same link:
"Use your fingertips to guide the fabric. Regardless of how fast or slow you sew, too much pressure on the fabric prevents it from moving easily under the needle."


Preparation of material...  will report when my AA batteries are charged again...

Bye now..
Anic

Saturday, October 9, 2010

Applique Key Pouch

Dear all,

Hope you have a wonderful weekend....

My key chain is really old, so I made myself a key pouch...  :)  It is a design from a book by Shinnie in Taiwan.   I bought the book locally and it is a version published by Publisher in China with the right to publish from Shinnie.  Cheaper....  :)

17cm x 11cm (w x h, includes 1 cm of seam)

Rivet came with the key holder, it was fixed with hammer and the metal piece was also glued 
to the fabric using UHU all purpose adhesive for additional strength.   
This is my own idea.. didn't google what others do.  :) 


Happy that I have a new key pouch but not fully satisfied with the work...  plenty of rooms for improvement..
Compare to the work presented in the book... this is rough.. :)


In case you would also like to make one (not necessary applique version), here are places which sell the key holders:
2)  Heart-handy

The fabric materials were mixed & matched from my fabric stash which took me quite a bit of time & effort.    If you are fancy of making one of these and want an easy way, kit is available from:

It is still time consuming... but at least you don't have to collect the material and buy the book..  :)

Bye now,
Anic

Tuesday, August 24, 2010

Kitty Applique Coin Purse Project - Part 2 (Quilting Technique)


Finally I completed this kitty coin purse.  It was almost fully hand sewn except the seam which I sewn it with machine.  Regretted! :(   I looked at some other similar material craft work and the seam without stitch line shown is nicer..

My first piece of quilting craft.  As expected, work of beginner without quilting technique.  The thread was not pull tight enough and stitches length not even and too big.   Never mind.
 
Below are links I found useful but I read them too late:

1) http://sentimentalstitches.net/instructions/hand-quilting/
A good overview on hand quilting

2) http://annamariahorner.blogspot.com/2010/03/stitch.html
I learnt how to hide the knot from here.   Basically make a knot and then gently tug it through the first layer of fabric.

3) http://www.threadsmagazine.com/item/3734/perfect-your-hand-quilting-stitch
Haven't figured out if the technique shown could be used when a hoop is not used.  


I am now doing a blanket stitch to the side of the zip to make it neater....


Thanks to the above link owners for sharing their knowledge...

Previous post about this project:
http://anic-lohas.blogspot.com/2010/08/kitty-applique-coin-purse-project.html

Saturday, August 21, 2010

Kitty Applique Coin Purse Project - Part 1 (Applique Technique)


A very good morning...

I have been doing this small project for a few days now, a little at a time, during my way to office, in the late evening after work... finally this morning, I finished the last bit of the kitties.

I wanted to learn applique quilting, even though I have not even done quilting before.  So, I bought this kitty applique coin purse kit online as I thought it will give me all the instructions I need.   My expectation was wrong.  It was not really for beginner like me who has never done one before.   Luckily the stitch names are there in the brief instructions provided, so I could ask my good friend, Mr Google what they are :).   I went searching and found tutorials for the stitches I need:

1) Needle Turn Applique Stitch - To sew the applique to the background without showing the stitch
http://appliquetoday.blogspot.com/2008/04/needleturn-applique-stitching-tutorial.html 

There is an easier way of doing this if the applique is large.  Sew the outline with wide stitch and then pull the thread so that the seam gathered underneath and sew it the same way as above.  I have only read the instructions but haven't tried it:
http://www.sewlover.com/basic/applique_technique.html

Another tutorial: http://www.360doc.com/content/10/0929/09/69678_57231974.shtml

2) Fly Stitch for the nose & mouth

http://inaminuteago.com/stitchdict/stitch/fly.html

3) Outline Stitch - for the leg & moustache
http://stitchschool.blogspot.com/2009/12/stitch-school-stem-and-outline-stitch.html

Here is a handy stitch dictionary I found:
http://inaminuteago.com/stitchindex.html

Thanks to the link owners for sharing the information, otherwise I won't be able to complete the kitties. 

Bye now and have a wonderful weekend.http://www.360doc.com/content/10/0929/09/69678_57231974.shtml

Link Within

Related Posts with Thumbnails